Heres a case statement I wrote to check current users logged in,
what they are doing etc ...
[root@localhost Bash]# cat case.sh
#!/bin/bash
echo "1 - Shows a listing of currently logged-in users "
echo "2 - Shows who is logged on and what they are doing "
echo "3 - Shows a list of last logged-in users, including login time,
logout time, login IP address, etc"
echo " 4 - Same as last, except that by default it shows a log of the
file /var/log/btmp, which contains all the bad login attempts."
echo " 5 - This reports data maintained in /var/log/lastlog,
which is a record of the last time a user logged in."
echo "6 - Exit Menu"
echo "Enter your Options "
read e;
case $e in
1) who ;;
2) w ;;
3) last ;;
4) lastb ;;
5) lastlog ;;
6) exit;;
*) echo "$e Opps Option not available, Please choose between 1 to 5"
esac
Save the file and exit
Tuesday, May 30, 2006
Saturday, May 27, 2006
Nessus - Network Vulnerability Scanner
Nessus is made up of two parts : a client and a server.
You need a Unix-like system to use the server (Linux is just fine).
Steps
1) First Install Nessus Server
2) Second Install Nessus Plugins
3) Third Install Nessus Client
4) After you have done the above Register with Nessus to activate Plugins
http://www.nessus.org/plugins/register
http://www.nessus.org/plugins/index.php?view=register
5) Activate Plugin,
#nessus-fetch --register 5DC4-24CD-0B17-6ED8-1BFA
5DC4-24CD-0B17-6ED8-1BFA --- is the code i received in my Mailbox
6) Update the Plugin
[root@localhost ~]# nessus-update-plugins -v
7) Add a Nessus user to login to server and scan for Vulnerabilities.
In Mandriva 2006
You need to fetch 3 things For using Nessus:
For Nessus Server
[root@localhost ~]#urpmi nessus
For Nessus Plugins
[root@localhost ~]# urpmi nessus-plugins
ftp://distrib-coffee.ipsl.jussieu.fr/pub/linux/MandrivaLinux/official/2006.0
/i586/media/contrib/nessus-plugins-2.2.4-1mdk.i586.rpm
installing nessus-plugins-2.2.4-1mdk.i586.rpm from /var/cache/urpmi/rpms
Preparing... ###############################
1/1: nessus-plugins #############################################
For Nessus Client
[root@localhost ~]# urpmi nessus-client
ftp://distrib-coffee.ipsl.jussieu.fr/pub/linux/MandrivaLinux/official/2006.0
/i586/media/contrib/nessus-client-2.2.4-1mdk.i586.rpm
installing nessus-client-2.2.4-1mdk.i586.rpm from /var/cache/urpmi/rpms
Preparing... ###################################
1/1: nessus-client ##################################
Update Nessus Plugin :
#nessus-fetch --register 5DC4-24CD-0B17-6ED8-1BFA
Now Create a Nessus User to be able to login from Nessus Client :
[root@localhost ~]# nessus-adduser
Add a new nessusd user
----------------------
Login : sriram
Authentication (pass/cert) [pass] : pass
Login password :
Login password (again) :
Password : ***********
DN :
Rules :
Start Nessus Server
[root@localhost ~]# nessusd -D
Loading the plugins... 2856 (out of 3584)
------------------------------------------------------------------------------
You are running a version of Nessus which is not configured to receive
a full plugin feed. As a result, your security audits might produce incomplete
results.
To obtain a full plugin feed, you need to register your Nessus scanner
at the following URL :
http://www.nessus.org/register/
------------------------------------------------------------------------------
All plugins loaded
Update the Plugins :
[root@localhost ~]# nessus-update-plugins -v
Now login to the client with the user name created to find ,
if there are any Vulnerabilities :
[root@localhost ~]#nessus (This will open the Nessus Client)
You need a Unix-like system to use the server (Linux is just fine).
Steps
1) First Install Nessus Server
2) Second Install Nessus Plugins
3) Third Install Nessus Client
4) After you have done the above Register with Nessus to activate Plugins
http://www.nessus.org/plugins/register
http://www.nessus.org/plugins/index.php?view=register
5) Activate Plugin,
#nessus-fetch --register 5DC4-24CD-0B17-6ED8-1BFA
5DC4-24CD-0B17-6ED8-1BFA --- is the code i received in my Mailbox
6) Update the Plugin
[root@localhost ~]# nessus-update-plugins -v
7) Add a Nessus user to login to server and scan for Vulnerabilities.
In Mandriva 2006
You need to fetch 3 things For using Nessus:
For Nessus Server
[root@localhost ~]#urpmi nessus
For Nessus Plugins
[root@localhost ~]# urpmi nessus-plugins
ftp://distrib-coffee.ipsl.jussieu.fr/pub/linux/MandrivaLinux/official/2006.0
/i586/media/contrib/nessus-plugins-2.2.4-1mdk.i586.rpm
installing nessus-plugins-2.2.4-1mdk.i586.rpm from /var/cache/urpmi/rpms
Preparing... ###############################
1/1: nessus-plugins #############################################
For Nessus Client
[root@localhost ~]# urpmi nessus-client
ftp://distrib-coffee.ipsl.jussieu.fr/pub/linux/MandrivaLinux/official/2006.0
/i586/media/contrib/nessus-client-2.2.4-1mdk.i586.rpm
installing nessus-client-2.2.4-1mdk.i586.rpm from /var/cache/urpmi/rpms
Preparing... ###################################
1/1: nessus-client ##################################
Update Nessus Plugin :
#nessus-fetch --register 5DC4-24CD-0B17-6ED8-1BFA
Now Create a Nessus User to be able to login from Nessus Client :
[root@localhost ~]# nessus-adduser
Add a new nessusd user
----------------------
Login : sriram
Authentication (pass/cert) [pass] : pass
Login password :
Login password (again) :
User rulesLogin : sriram
----------
nessusd has a rules system which allows you to
restrict the hosts that sriram has the right
to test. For instance, you may want
him to be able to scan his own host only.
Please see the nessus-adduser(8) man page for
the rules syntax
Enter the rules for this user, and hit ctrl-D once
you are done :
(the user can have an empty rules set)
deny 10.163.156.1
accept 10.163.156.0/24
default deny
Password : ***********
DN :
Rules :
deny 10.163.156.1
accept 10.163.156.0/24
default deny

Is that ok ? (y/n) [y] Y
user added.
Start Nessus Server
[root@localhost ~]# nessusd -D
Loading the plugins... 2856 (out of 3584)
------------------------------------------------------------------------------
You are running a version of Nessus which is not configured to receive
a full plugin feed. As a result, your security audits might produce incomplete
results.
To obtain a full plugin feed, you need to register your Nessus scanner
at the following URL :
http://www.nessus.org/register/
------------------------------------------------------------------------------
All plugins loaded
Update the Plugins :
[root@localhost ~]# nessus-update-plugins -v
Now login to the client with the user name created to find ,
if there are any Vulnerabilities :
[root@localhost ~]#nessus (This will open the Nessus Client)
Thursday, May 25, 2006
Linux Feed Reader
Liferea is an aggregator for online news feeds.
There are many other news readers available, but these
others are not available for Linux or require many extra
libraries to be installed. Liferea tries to fill this gap
by creating a fast, easy to use, easy to install news
aggregator for GTK/GNOME.
In Mandriva 2006 , you can use urpmi(Package Manger)
to download and install this Feed Reader.
[root@localhost ~]# urpmi liferea
ftp://distrib-coffee.ipsl.jussieu.fr/pub/linux/MandrivaLinux/official/2006.0/
i586/media/contrib/liferea-0.9.7b-4mdk.i586.rpm
installing liferea-0.9.7b-4mdk.i586.rpm from /var/cache/urpmi/rpms
Preparing... #############################################
1/1: liferea #############################################
This should install liferea.
To start liferea, type liferea& in the Console.
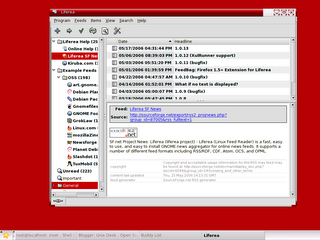
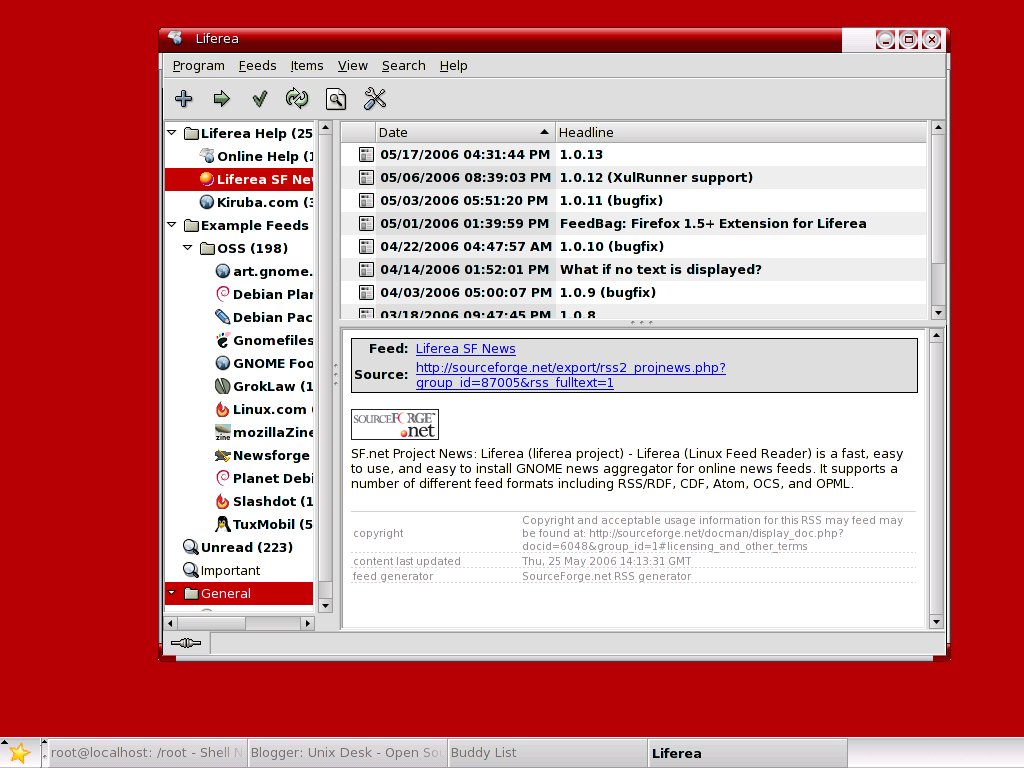
Heres the screenshot of Liferea
There are many other news readers available, but these
others are not available for Linux or require many extra
libraries to be installed. Liferea tries to fill this gap
by creating a fast, easy to use, easy to install news
aggregator for GTK/GNOME.
In Mandriva 2006 , you can use urpmi(Package Manger)
to download and install this Feed Reader.
[root@localhost ~]# urpmi liferea
ftp://distrib-coffee.ipsl.jussieu.fr/pub/linux/MandrivaLinux/official/2006.0/
i586/media/contrib/liferea-0.9.7b-4mdk.i586.rpm
installing liferea-0.9.7b-4mdk.i586.rpm from /var/cache/urpmi/rpms
Preparing... #############################################
1/1: liferea #############################################
This should install liferea.
To start liferea, type liferea& in the Console.
Heres the screenshot of Liferea
Monday, May 15, 2006
Forensic Tools
List of Forensic and Network Security Tools installed - Most of these
tools are not graphical.
tools are not graphical.
-
Sleuth Kit - Command Line Forensic Tools - www.sleuthkit.org
- utopsy - Part of Sleuth Kit
- foremost - Command line data carving tool. Config file in /foremost directory. Need external storage to run properly - foremost.sourceforge.net
- glimpse - Command line data indexing and searching tool. Need external storage to run properly - www.webglimpse.net
- wipe - Command line utility to securely wipe hard drives and files - wipe.sourceforge.net
- dcfldd - Enhanced DD imager with built in hashing. Works like dd from command line. For more info read the man page (man dcfldd).
- etherape - Visual network monitor - etherape.sourceforge.net/
- fenris - Multipurpose tracer - razor.bindview.com/tools/fenris/
- honeyd - Command line honypot program - www.citi.umich.edu/u/provos/honeyd/
- snort (Default Rules) - Command line network intrusion tool - www.snort.org
- dsniff - Command Line network auditing and penetration testing tools - www.monkey.org/~dugsong/dsniff/
- John The Ripper - Command Line Password Cracking tool - www.openwall.com/john/
- Nikto - Webserver scanner - www.cirt.net/code/nikto.shtml
- nbtscan - Command-line tool that scans for open NETBIOS nameservers - www.unixwiz.net/tools/nbtscan.html
- xprobe - Command line remote operating system fingerprinting tool - www.sys-security.com
- Ngrep - Command line Network grep Function - www.packetfactory.net/projects/ngrep/
- Nemesis - Command Line network packet injector - www.packetfactory.net/Projects/nemesis/
- fragroute - Command line network intrusion testing tool - monkey.org/~dugsong/fragroute/
- fping - Command line multiple host ping utility - www.fping.com
- TCPtraceroute - Command line traceroute TCP packages - michael.toren.net/code/tcptraceroute/
- tcpreplay - Command line utility that replays a tcp dump - tcpreplay.sourceforge.net
- Nessus - Graphical Security Scanner - www.nessus.org
- Ethereal - Graphical Network analyzer - www.ethereal.com
- Netcat - Command line tool to read and write over network - www.atstake.com/research/tools/network_utilities/
- tcpdump - Command line tool that dumps network traffic - www.tcpdump.org/
- hping2 - Command line packet assembler / analyzer - www.hping.org
- ettercap - Command line sniffer / interceptor / logger for Ethernet networks - ettercap.sourceforge.net
- openssh - Secure remote connection utility - www.openssh.com
- Kismet - Graphical wireless network sniffer - www.kismetwireless.net
- airsnort - Graphical wireless network intrusion tool - airsnort.shmoo.com
- GPG - Encryption utility - www.gnupg.org/
- OpenSSL - Secure remote connection utility - www.openssl.org/
- lsof - Command line utility that lists all open files - read man page (man lsof)
- hunt - Command line TCP / IP exploit scanner - lin.fsid.cvut.cz/~kra/index.html
- stunnel - SSL connection package - stunnel.mirt.net
- arpwatch - Command line Ethernet monitor - read man page (man arpwatch)
- dig - Command line tool for querying domain name servers - read man page (man dig)
- chkrootkit - Looks for signs of root kit - www.chkrootkit.org
- Nmap - Network exploration tool and Security Scanner.
- Dsniff - Password Sniffer.
- Tripwire - Tripwire creates a signature database of the files on a system, and when run in compare mode, will alert system administrators to changes in the file system.
Sunday, May 14, 2006
Daily Checklist ... ... ...
Check List for Server Safeguards :
Check if any rpms have been installed Lately :
[root@localhost ~]# rpm -qa --last |more
xinetd-2.3.13-2mdk Sat 13 May 2006 08:14:31 PM EDT
anonftp-3.0-31mdk Sat 13 May 2006 08:10:01 PM EDT
wu-ftpd-2.6.2-6mdk Sat 13 May 2006 08:07:00 PM EDT
Checking People Connected to a Specific PORT :
For Example (port - 21,22,25 etc ...)
I checked for Port 25
[root@localhost ram]# lsof -i :25
COMMAND PID USER FD TYPE
master 5761 root 11u IPv4
telnet 21932 root 3u IPv4
smtpd 21933 postfix 6u IPv4
smtpd 21933 postfix 10u IPv4
DEVICE SIZE NODE NAME
12532 TCP localhost:smtp (LISTEN)
106579 TCP localhost:4835->localhost:smtp (ESTABLISHED)
12532 TCP localhost:smtp (LISTEN)
106600 TCP localhost:smtp->localhost:4835 (ESTABLISHED)
Another way is to use TCPDUMP to see any active connections are made to
a Particular port :
[root@localhost ~]# tcpdump -l -i eth0 port 22
tcpdump: verbose output suppressed, use -v or -vv for full protocol decode
listening on lo, link-type EN10MB (Ethernet), capture size 96 bytes
This will list the IP addresses from where the connections are made.
11:28:17.137522 IP localhost.ssh > localhost.1460: F 1463822750:1463822750(0)
ack 1461555328 win 8192
11:28:17.138112 IP localhost.1460 > localhost.ssh: F 1:1(0) ack 1 win 8192
11:28:17.138133 IP localhost.ssh > localhost.1460: . ack 2 win 8192
The above shows that I have made a connection from localhost to localhost on port 22
Imagine Systems stops working suddenly, One thing that comes immediately
to our mind is what changed :
#find /ram -mmin -30
The above commmad will find Files that have been changed in /ram in the
last 30 Minutes
#find / -mtime -1
The above command will recursively list all the file from / that have changed in the last
day.
Checking Logs
Check for Log Files created in /var/log , Files will be created as per applications
used by you.
Common Log files are
/var/log/boot.log --- Systems services that has been Started/Stopped
May 14 12:46:28 localhost xinetd: xinetd shutdown succeeded
May 14 12:46:35 localhost xinetd: xinetd startup succeeded
/var/log/messages --- Check Logins
May 14 12:50:27 localhost sshd[22453]: Accepted password for sriram
from 127.0.0.1 port 3242 ssh2
/var/log/secure --- Check Xinetd Services
May 14 09:30:07 localhost xinetd[5396]: START: ftp pid=21491 from=127.0.0.1
May 14 09:31:27 localhost xinetd[5396]: EXIT: ftp pid=21491 duration=80(sec)
May 14 11:15:32 localhost xinetd[5396]: START: ftp pid=21925 from=127.0.0.1
May 14 11:17:13 localhost xinetd[5396]: EXIT: ftp pid=21925 duration=101(sec)
/var/log/auth.log --- Check Authetication Failures
May 14 11:15:32 localhost xinetd[5396]: START: ftp pid=21925 from=127.0.0.1
May 14 11:17:13 localhost xinetd[5396]: EXIT: ftp pid=21925 duration=101(sec)
May 14 11:28:17 localhost sshd[22092]: fatal: Timeout before authentication for 127.0.0.1
May 14 12:50:27 localhost sshd[22453]: Accepted password for sriram from
127.0.0.1 port 3242 ssh2
May 14 12:52:18 localhost sshd[22503]: Accepted password for sriram from 127.0.0.1
port 3245 ssh2
#dmesg
The program helps users to print out their bootup messages.
Checking Disk Space of a Particular Folder,Files
[root@localhost ram]# du -h -s Beatles/
27M Beatles/
Install Dsniff for Packet Sniffing
[root@localhost ram]# dsniff
dsniff: listening on eth0
-----------------
05/14/06 16:58:47 tcp 10.10.93.220.1785 -> distrib-coffee.ipsl.jus.21 (ftp)
USER anonymous
PASS curl_by_sriram@haha.com
-----------------
05/14/06 17:35:24 tcp 10.10.93.220.1875 -> 202.41.x.x.21 (ftp)
USER xyz
PASS xyz123
Check for Current connections made FROM and TO Server
[root@localhost ram]# netstat -apln --inet
Active Internet connections (servers and established)
Will List the Complete details of From-IP-Port to To-IP-Port live connections.
Rejecting a Particular connections with out using IPTables
Say you do not want to reject request for a particular IP Address
Incomming and Outgoing
For Rejection:
[root@localhost ram]# route add -host 202.x.x.x reject
Again to allow:
[root@localhost ram]# route del -host 202.87.41.71 reject
If for eg. if you want to block a particular site do this
[root@localhost ram]# ping xyz.com
PING xyz.com (64.146.134.38) 56(84) bytes of data.
Now to block xyz.com
[root@localhost ram]# route add -host 64.146.134.38 reject
You can also block the Domain Name,
[root@localhost ram]# route add -host xyz.com reject
after blocking try xyz.com in your browser,
The message I got in my browser was,
"Connection was refused when attempting to contact xyz.com"
To unblock Later
[root@localhost ram]# route del -host xyz.com reject
Preventing DDOS Attack- Say your Load on the server is very high
For a Particular Service say HTTP- Port 80
Then you may do the Following :
1) At command prompt execute the below command
Like let me say , that you have more than 30 connection from a single ip.
Under normal cases there is no need for that many number of connection
requests from a single IP. Try to identify such ips/networks from the list you get.
To Unblock
[root@localhost ~]# iptables -D INPUT -s 202.87.x.x -j REJECT
Suppose 202.87.x.x is website than that site will also be blocked.
Some Commands :
# lspci list all your pci devices
# netstat -arn show your network route information
# netstat -ap 2 | grep EST show established connections, updates every 2 sec
# netstat -Cr print routing information from routing cache
# iptables -nL show your current iptables configuration in numeric form
# ping -c ping X times.
# ping6 ping ipv6 addresses
# dmesg print or control the kernel ring buffer, bootup messages
# uptime check your linux servers uptime and load
Try this when your System Hangs - To Trace the Problems ?
Try the following:
1. Capture an alt-sysrq-t or alt-sysrq-p or alt-sysrq-b or alt-sysrq-m backtrace when the hang occurs.
2. Capture whatever is on the screen.
3. Look for kerlnel oops in the /var/log/messages or /var/log/syslog after reboot.
Note : sysrq is the Delete Key
Securing and Hardenning Linux Check this
Check if any rpms have been installed Lately :
[root@localhost ~]# rpm -qa --last |more
xinetd-2.3.13-2mdk Sat 13 May 2006 08:14:31 PM EDT
anonftp-3.0-31mdk Sat 13 May 2006 08:10:01 PM EDT
wu-ftpd-2.6.2-6mdk Sat 13 May 2006 08:07:00 PM EDT
Checking People Connected to a Specific PORT :
For Example (port - 21,22,25 etc ...)
I checked for Port 25
[root@localhost ram]# lsof -i :25
COMMAND PID USER FD TYPE
master 5761 root 11u IPv4
telnet 21932 root 3u IPv4
smtpd 21933 postfix 6u IPv4
smtpd 21933 postfix 10u IPv4
DEVICE SIZE NODE NAME
12532 TCP localhost:smtp (LISTEN)
106579 TCP localhost:4835->localhost:smtp (ESTABLISHED)
12532 TCP localhost:smtp (LISTEN)
106600 TCP localhost:smtp->localhost:4835 (ESTABLISHED)
Another way is to use TCPDUMP to see any active connections are made to
a Particular port :
[root@localhost ~]# tcpdump -l -i eth0 port 22
tcpdump: verbose output suppressed, use -v or -vv for full protocol decode
listening on lo, link-type EN10MB (Ethernet), capture size 96 bytes
This will list the IP addresses from where the connections are made.
11:28:17.137522 IP localhost.ssh > localhost.1460: F 1463822750:1463822750(0)
ack 1461555328 win 8192
11:28:17.138112 IP localhost.1460 > localhost.ssh: F 1:1(0) ack 1 win 8192
11:28:17.138133 IP localhost.ssh > localhost.1460: . ack 2 win 8192
The above shows that I have made a connection from localhost to localhost on port 22
Imagine Systems stops working suddenly, One thing that comes immediately
to our mind is what changed :
#find /ram -mmin -30
The above commmad will find Files that have been changed in /ram in the
last 30 Minutes
#find / -mtime -1
The above command will recursively list all the file from / that have changed in the last
day.
Checking Logs
Check for Log Files created in /var/log , Files will be created as per applications
used by you.
Common Log files are
/var/log/boot.log --- Systems services that has been Started/Stopped
May 14 12:46:28 localhost xinetd: xinetd shutdown succeeded
May 14 12:46:35 localhost xinetd: xinetd startup succeeded
/var/log/messages --- Check Logins
May 14 12:50:27 localhost sshd[22453]: Accepted password for sriram
from 127.0.0.1 port 3242 ssh2
/var/log/secure --- Check Xinetd Services
May 14 09:30:07 localhost xinetd[5396]: START: ftp pid=21491 from=127.0.0.1
May 14 09:31:27 localhost xinetd[5396]: EXIT: ftp pid=21491 duration=80(sec)
May 14 11:15:32 localhost xinetd[5396]: START: ftp pid=21925 from=127.0.0.1
May 14 11:17:13 localhost xinetd[5396]: EXIT: ftp pid=21925 duration=101(sec)
/var/log/auth.log --- Check Authetication Failures
May 14 11:15:32 localhost xinetd[5396]: START: ftp pid=21925 from=127.0.0.1
May 14 11:17:13 localhost xinetd[5396]: EXIT: ftp pid=21925 duration=101(sec)
May 14 11:28:17 localhost sshd[22092]: fatal: Timeout before authentication for 127.0.0.1
May 14 12:50:27 localhost sshd[22453]: Accepted password for sriram from
127.0.0.1 port 3242 ssh2
May 14 12:52:18 localhost sshd[22503]: Accepted password for sriram from 127.0.0.1
port 3245 ssh2
#dmesg
The program helps users to print out their bootup messages.
Checking Disk Space of a Particular Folder,Files
[root@localhost ram]# du -h -s Beatles/
27M Beatles/
Install Dsniff for Packet Sniffing
[root@localhost ram]# dsniff
dsniff: listening on eth0
-----------------
05/14/06 16:58:47 tcp 10.10.93.220.1785 -> distrib-coffee.ipsl.jus.21 (ftp)
USER anonymous
PASS curl_by_sriram@haha.com
-----------------
05/14/06 17:35:24 tcp 10.10.93.220.1875 -> 202.41.x.x.21 (ftp)
USER xyz
PASS xyz123
Check for Current connections made FROM and TO Server
[root@localhost ram]# netstat -apln --inet
Active Internet connections (servers and established)
Will List the Complete details of From-IP-Port to To-IP-Port live connections.
Rejecting a Particular connections with out using IPTables
Say you do not want to reject request for a particular IP Address
Incomming and Outgoing
For Rejection:
[root@localhost ram]# route add -host 202.x.x.x reject
Again to allow:
[root@localhost ram]# route del -host 202.87.41.71 reject
If for eg. if you want to block a particular site do this
[root@localhost ram]# ping xyz.com
PING xyz.com (64.146.134.38) 56(84) bytes of data.
Now to block xyz.com
[root@localhost ram]# route add -host 64.146.134.38 reject
You can also block the Domain Name,
[root@localhost ram]# route add -host xyz.com reject
after blocking try xyz.com in your browser,
The message I got in my browser was,
"Connection was refused when attempting to contact xyz.com"
To unblock Later
[root@localhost ram]# route del -host xyz.com reject
Preventing DDOS Attack- Say your Load on the server is very high
For a Particular Service say HTTP- Port 80
Then you may do the Following :
1) At command prompt execute the below command
bash#netstat -lpn|grep :80 |awk '{print $5}'|sort
2) Check each block of ips.
Like let me say , that you have more than 30 connection from a single ip.
Under normal cases there is no need for that many number of connection
requests from a single IP. Try to identify such ips/networks from the list you get.
3) If more than 5 host/ip connects from the same network then its a clear sign of DDOS .
4) Block that ips/networks using iptables /Apf
[root@localhost ~]# iptables -I INPUT -s 202.87.X.X -j REJECT
If you have apf then just add the ips which you want to block in the file /etc/apf/deny_hosts.rules
5) Keep on continuing this process untill the attack on the machine gets reduced.
To Unblock
[root@localhost ~]# iptables -D INPUT -s 202.87.x.x -j REJECT
Suppose 202.87.x.x is website than that site will also be blocked.
Some Commands :
# lspci list all your pci devices
# netstat -arn show your network route information
# netstat -ap 2 | grep EST show established connections, updates every 2 sec
# netstat -Cr print routing information from routing cache
# iptables -nL show your current iptables configuration in numeric form
# ping -c ping X times.
# ping6 ping ipv6 addresses
# dmesg print or control the kernel ring buffer, bootup messages
# uptime check your linux servers uptime and load
Try this when your System Hangs - To Trace the Problems ?
Try the following:
1. Capture an alt-sysrq-t or alt-sysrq-p or alt-sysrq-b or alt-sysrq-m backtrace when the hang occurs.
2. Capture whatever is on the screen.
3. Look for kerlnel oops in the /var/log/messages or /var/log/syslog after reboot.
Note : sysrq is the Delete Key
Securing and Hardenning Linux Check this
Saturday, May 13, 2006
Setting up FTP and Anonymous FTP Server
There are two kinds of FTP service. One allows regular users on your
system to login from a remote system using FTP. The other type of FTP
is anonymous FTP which allows any user on a remote system to login to
your system and download files from the /home/ftp/pub/ directory.
In order to set up either of these types of FTP on your system,
you need the package wu-ftpd. To enable anonymous FTP, you’ll also
need the anonftp package. If these are not installed, they come with all
distributions of Linux, and are also available at rpmfind.net
First download and Install
wu-ftp (For Regular FTP user with User Logins)
anon-ftp (For Anonymous Logins)
Xinetd (For Start/Stop the above Services)
then,
Create directory /home/ftp/pub for anonymous logins
Set permission for /home/ftp/pub to read
chmod -R 444 /home/ftp
Change the ownership permission to sriram
chown -R sriram.sriram /home/ftp
[root@localhost jabberd-2.0s11]# urpmi wu-ftpd
ftp://distrib-coffee.ipsl.jussieu.fr/pub/linux/MandrivaLinux/official
/2006.0/i586/media/contrib/wu-ftpd-2.6.2-6mdk.i586.rpm
installing wu-ftpd-2.6.2-6mdk.i586.rpm from /var/cache/urpmi/rpms
Preparing... #############################################
1/1: wu-ftpd #############################################
[root@localhost jabberd-2.0s11]# urpmi anonftp
ftp://distrib-coffee.ipsl.jussieu.fr/pub/linux/MandrivaLinux/official
/2006.0/i586/media/contrib/anonftp-3.0-31mdk.i586.rpm
installing anonftp-3.0-31mdk.i586.rpm from /var/cache/urpmi/rpms
Preparing... #############################################
1/1: anonftp #############################################
[root@localhost jabberd-2.0s11]#
[root@localhost jabberd-2.0s11]# urpmi xinetd
ftp://distrib-coffee.ipsl.jussieu.fr/pub/linux/MandrivaLinux/official
/2006.0/i586/media/main/xinetd-2.3.13-2mdk.i586.rpm
installing xinetd-2.3.13-2mdk.i586.rpm from /var/cache/urpmi/rpms
Preparing... #############################################
1/1: xinetd #############################################
[root@localhost xinetd.d]# pwd
/etc/xinetd.d
[root@localhost xinetd.d]# cat wu-ftpd
# default: on
# description: The wu-ftpd FTP server serves FTP connections. It uses \
# normal, unencrypted usernames and passwords for authentication.
service ftp
{
socket_type = stream
wait = no
user = root
server = /usr/sbin/in.ftpd
server_args = -l -a
log_on_success += DURATION USERID
log_on_failure += USERID
nice = 10
}
[root@localhost xinetd.d]#
[root@localhost jabberd-2.0s11]# /etc/rc.d/init.d/xinetd start
Starting xinetd: [ OK ]
[root@localhost jabberd-2.0s11]# telnet localhost 21
Trying 127.0.0.1...
Connected to localhost (127.0.0.1).
Escape character is '^]'.
220 localhost FTP server (Version wu-2.6.2(1) Thu Jun 2 19:14:54 CEST 2005) ready.
quit
221 Goodbye.
Now Setting up Anonymous ftp :
Create directory /home/ftp/pub with just read permission and change the user to sriram or any
local user you may have created never root.
[root@localhost ~]# mkdir -p /home/ftp/pub
[root@localhost ~]#cd /home
[root@localhost home]# chmod -R 444 ftp/
[root@localhost xinetd.d]# chown -R sriram.sriram /home/ftp
Restart Xinetd and see if anonymous ftp is working :
[root@localhost ~]# ftp
ftp> o
(to) localhost
Connected to localhost.
220 localhost FTP server (Version wu-2.6.2(1) Thu Jun 2 19:14:54 CEST 2005) ready.
530 Please login with USER and PASS.
Name (localhost:root): anonymous
331 Guest login ok, send your complete e-mail address as password.
Password:
230-The response 'haha' is not valid
230-Next time please use your e-mail address as your password
230- for example: joe@localhost
230 Guest login ok, access restrictions apply.
Remote system type is UNIX.
Using binary mode to transfer files.
ftp> ls
200 PORT command successful.
150 Opening ASCII mode data connection for directory listing.
total 32
d--x--x--x 2 root root 4096 May 14 00:10 bin
d--x--x--x 2 root root 4096 May 14 00:10 etc
drwxr-xr-x 2 root root 4096 May 14 00:10 lib
drwxr-xr-x 2 root 423 4096 May 10 2005 pub
226 Transfer complete.
ftp>
Ping - Find total number of systems up in your Network
Say you are in a network 10.10.93.1-255 and you want to see number of Sytems Up in your network.
[root@localhost Sriram]# nmap -sP 10.10.93.1-255
Starting nmap 3.81 ( http://www.insecure.org/nmap/ ) at 2006-05-13 09:32 EDT
Host 10.10.93.79 appears to be up.
MAC Address: 00:13:8F:1F:FE:B5 (Unknown)
Host 10.10.93.154 appears to be up.
MAC Address: 00:0B:2B:11:DE:0E (Hostnet)
Host 10.10.93.220 appears to be up.
Host 10.10.93.250 appears to be up.
MAC Address: 00:12:43:7C:FB:00 (Cisco)
Host 10.10.93.252 appears to be up.
MAC Address: 00:01:A8:02:3B:F1 (Welltech Computer Co.)
Host 10.10.93.255 seems to be a subnet broadcast address (returned 1 extra pings).
Nmap finished: 255 IP addresses (5 hosts up) scanned in 12.128 seconds
Nmap lets you know which hosts responds to your PING.
Thanks to this
Detect Rootkits or Torjans installed
How do u Find if your System has been compromised ?
Rootcheck helps you to find rootkits or detect their presence. Probably
you are familiar with chkrootkit and rkhunter, they are good tools to scan
your Linux system for rootkit activity.
Heres how to scan your server using rootcheck to scan your computer for
signs of tampering.
[root@localhost ~]# mkdir rootkit
[root@localhost ~]# cd rootkit/
[root@localhost rootkit]# wget http://www.ossec.net/rootcheck/files/rootcheck-0.6.tar.gz
--07:09:34-- http://www.ossec.net/rootcheck/files/rootcheck-0.6.tar.gz
=> `rootcheck-0.6.tar.gz'
Resolving www.ossec.net... 66.240.231.110
Connecting to www.ossec.net|66.240.231.110|:80... connected.
HTTP request sent, awaiting response... 200 OK
Length: 39,748 (39K) [application/x-gzip]
100%[====================================>] 39,748 11.27K/s ETA 00:00
07:09:40 (11.25 KB/s) - `rootcheck-0.6.tar.gz' saved [39748/39748]
[root@localhost rootkit]# tar -zxvf rootcheck-0.6.tar.gz
rootcheck-0.6
rootcheck-0.6/src
rootcheck-0.6/src/shared
rootcheck-0.6/src/shared/Makefile
rootcheck-0.6/src/shared/debug_op.c
rootcheck-0.6/src/shared/file_op.c
rootcheck-0.6/src/shared/help.c
rootcheck-0.6/src/shared/mem_op.c
rootcheck-0.6/src/shared/sig_op.c
rootcheck-0.6/src/shared/privsep_op.c
rootcheck-0.6/src/shared/pthreads_op.c
rootcheck-0.6/src/shared/regex_op.c
rootcheck-0.6/src/os_xml
rootcheck-0.6/src/os_xml/Makefile
rootcheck-0.6/src/os_xml/README
rootcheck-0.6/src/os_xml/VERSION
rootcheck-0.6/src/os_xml/os_xml.c
rootcheck-0.6/src/os_xml/os_xml.h
rootcheck-0.6/src/os_xml/os_xml_access.c
rootcheck-0.6/src/os_xml/os_xml_node_access.c
rootcheck-0.6/src/os_xml/os_xml_variables.c
rootcheck-0.6/src/os_xml/COPYRIGHT
rootcheck-0.6/src/rootcheck
rootcheck-0.6/src/rootcheck/db
rootcheck-0.6/src/rootcheck/db/rootkit_files.txt
rootcheck-0.6/src/rootcheck/db/rootkit_trojans.txt
rootcheck-0.6/src/rootcheck/check_rc_dev.c
rootcheck-0.6/src/rootcheck/check_rc_files.c
rootcheck-0.6/src/rootcheck/check_rc_if.c
rootcheck-0.6/src/rootcheck/check_rc_pids.c
rootcheck-0.6/src/rootcheck/check_rc_ports.c
rootcheck-0.6/src/rootcheck/check_rc_readproc.c
rootcheck-0.6/src/rootcheck/check_rc_sys.c
rootcheck-0.6/src/rootcheck/check_rc_trojans.c
rootcheck-0.6/src/rootcheck/common.c
rootcheck-0.6/src/rootcheck/config.c
rootcheck-0.6/src/rootcheck/os_string.c
rootcheck-0.6/src/rootcheck/rootcheck.c
rootcheck-0.6/src/rootcheck/rootcheck.conf
rootcheck-0.6/src/rootcheck/rootcheck.h
rootcheck-0.6/src/rootcheck/run_rk_check.c
rootcheck-0.6/src/rootcheck/Makefile
rootcheck-0.6/src/rootcheck/check_open_ports.c
rootcheck-0.6/src/rootcheck/rootkit_files.txt
rootcheck-0.6/src/rootcheck/rootkit_trojans.txt
rootcheck-0.6/src/headers
rootcheck-0.6/src/headers/ar.h
rootcheck-0.6/src/headers/debug_op.h
rootcheck-0.6/src/headers/defs.h
rootcheck-0.6/src/headers/file_op.h
rootcheck-0.6/src/headers/help.h
rootcheck-0.6/src/headers/list_op.h
rootcheck-0.6/src/headers/mem_op.h
rootcheck-0.6/src/headers/mq_op.h
rootcheck-0.6/src/headers/os_err.h
rootcheck-0.6/src/headers/privsep_op.h
rootcheck-0.6/src/headers/pthreads_op.h
rootcheck-0.6/src/headers/rc.h
rootcheck-0.6/src/headers/regex_op.h
rootcheck-0.6/src/headers/sec.h
rootcheck-0.6/src/headers/shared.h
rootcheck-0.6/src/headers/sig_op.h
rootcheck-0.6/src/error_messages
rootcheck-0.6/src/error_messages/error_messages.h
rootcheck-0.6/src/Config.Make
rootcheck-0.6/src/Makeall
rootcheck-0.6/src/LOCATION
rootcheck-0.6/src/VERSION
rootcheck-0.6/Makefile
rootcheck-0.6/README
[root@localhost rootkit]# cd rootcheck-0.6
[root@localhost rootcheck-0.6]# ls
Makefile README src/
[root@localhost rootcheck-0.6]# make all
Making os_xml
make[1]: Entering directory `/root/rootkit/rootcheck-0.6/src/os_xml'
gcc -DXML_VAR=\"var\" -Wall -I../ -I../headers/ -DARGV0=\"os_xml\" -DXML_VAR=\"var\" -DOSSECHIDS -c os_xml.c os_xml_access.c os_xml_node_access.c os_xml_variables.c
ar cru os_xml.a os_xml.o os_xml_access.o os_xml_node_access.o os_xml_variables.o
ranlib os_xml.a
make[1]: Leaving directory `/root/rootkit/rootcheck-0.6/src/os_xml'
Making shared
make[1]: Entering directory `/root/rootkit/rootcheck-0.6/src/shared'
gcc -c -Wall -I../ -I../headers/ -DARGV0=\"shared-libs\" -DXML_VAR=\"var\" -DOSSECHIDS *.c
ar cru lib_shared.a *.o
ranlib lib_shared.a
make[1]: Leaving directory `/root/rootkit/rootcheck-0.6/src/shared'
Making rootcheck
make[1]: Entering directory `/root/rootkit/rootcheck-0.6/src/rootcheck'
gcc -Wall -I../ -I../headers/ -DARGV0=\"ossec-rootcheck\" -DXML_VAR=\"var\" -DOSSECHIDS *.c ../shared/lib_shared.a ../os_xml/os_xml.a -U OSSECHIDS -D_GNU_SOURCE -o ossec-rootcheck
make[1]: Leaving directory `/root/rootkit/rootcheck-0.6/src/rootcheck'
[root@localhost rootcheck-0.6]# ls
db/ Makefile ossec-rootcheck* README rootcheck.conf* src/
[root@localhost rootcheck-0.6]# cat rootcheck.conf
no
syslog
./db/rootkit_files.txt
./db/rootkit_trojans.txt
[root@localhost rootcheck-0.6]# ./ossec-rootcheck -c rootcheck.conf
Starting rootcheck (http://www.ossec.net/rootcheck)
Be patient, it may take a few minutes to complete...
[OK]: No presence of public rootkits detected. Analized 236 files.
[OK]: No binaries with any trojan detected. Analized 54 files
[FAILED]: File '/dev/.started' present on /dev. Possible hidden file.
[OK]: No problem found on the system. Analized 96036 files.
[OK]: No hidden process by Kernel-level rootkits.
/bin/ps is not trojaned. Analized 32768 processes.
[OK]: No kernel-level rootkit hiding any port.
Netstat is acting correctly. Analized 131072 ports.
[OK]: The following ports are open:
22 (tcp),25 (tcp),80 (tcp),111 (tcp),111 (udp),
137 (udp),138 (udp),139 (tcp),389 (tcp),
443 (tcp),445 (tcp),756 (udp),759 (udp),
762 (tcp),973 (udp),976 (tcp),1024 (udp),
1025 (tcp),1026 (udp),2049 (tcp),2049 (udp),
5335 (tcp),5353 (udp),6000 (tcp),7741 (tcp),7741 (udp),
8118 (tcp),9050 (tcp),10026 (tcp)
[OK]: No problem detected on ifconfig/ifs. Analized 2 interfaces.
From the above report only alert is '/dev/.started' which I checked
[root@localhost rootcheck-0.6]# file /dev/.started
/dev/.started: empty
[root@localhost rootcheck-0.6]# cat /dev/.started
The file /dev/.started is empty so NO Problems
Rootcheck helps you to find rootkits or detect their presence. Probably
you are familiar with chkrootkit and rkhunter, they are good tools to scan
your Linux system for rootkit activity.
Heres how to scan your server using rootcheck to scan your computer for
signs of tampering.
[root@localhost ~]# mkdir rootkit
[root@localhost ~]# cd rootkit/
[root@localhost rootkit]# wget http://www.ossec.net/rootcheck/files/rootcheck-0.6.tar.gz
--07:09:34-- http://www.ossec.net/rootcheck/files/rootcheck-0.6.tar.gz
=> `rootcheck-0.6.tar.gz'
Resolving www.ossec.net... 66.240.231.110
Connecting to www.ossec.net|66.240.231.110|:80... connected.
HTTP request sent, awaiting response... 200 OK
Length: 39,748 (39K) [application/x-gzip]
100%[====================================>] 39,748 11.27K/s ETA 00:00
07:09:40 (11.25 KB/s) - `rootcheck-0.6.tar.gz' saved [39748/39748]
[root@localhost rootkit]# tar -zxvf rootcheck-0.6.tar.gz
rootcheck-0.6
rootcheck-0.6/src
rootcheck-0.6/src/shared
rootcheck-0.6/src/shared/Makefile
rootcheck-0.6/src/shared/debug_op.c
rootcheck-0.6/src/shared/file_op.c
rootcheck-0.6/src/shared/help.c
rootcheck-0.6/src/shared/mem_op.c
rootcheck-0.6/src/shared/sig_op.c
rootcheck-0.6/src/shared/privsep_op.c
rootcheck-0.6/src/shared/pthreads_op.c
rootcheck-0.6/src/shared/regex_op.c
rootcheck-0.6/src/os_xml
rootcheck-0.6/src/os_xml/Makefile
rootcheck-0.6/src/os_xml/README
rootcheck-0.6/src/os_xml/VERSION
rootcheck-0.6/src/os_xml/os_xml.c
rootcheck-0.6/src/os_xml/os_xml.h
rootcheck-0.6/src/os_xml/os_xml_access.c
rootcheck-0.6/src/os_xml/os_xml_node_access.c
rootcheck-0.6/src/os_xml/os_xml_variables.c
rootcheck-0.6/src/os_xml/COPYRIGHT
rootcheck-0.6/src/rootcheck
rootcheck-0.6/src/rootcheck/db
rootcheck-0.6/src/rootcheck/db/rootkit_files.txt
rootcheck-0.6/src/rootcheck/db/rootkit_trojans.txt
rootcheck-0.6/src/rootcheck/check_rc_dev.c
rootcheck-0.6/src/rootcheck/check_rc_files.c
rootcheck-0.6/src/rootcheck/check_rc_if.c
rootcheck-0.6/src/rootcheck/check_rc_pids.c
rootcheck-0.6/src/rootcheck/check_rc_ports.c
rootcheck-0.6/src/rootcheck/check_rc_readproc.c
rootcheck-0.6/src/rootcheck/check_rc_sys.c
rootcheck-0.6/src/rootcheck/check_rc_trojans.c
rootcheck-0.6/src/rootcheck/common.c
rootcheck-0.6/src/rootcheck/config.c
rootcheck-0.6/src/rootcheck/os_string.c
rootcheck-0.6/src/rootcheck/rootcheck.c
rootcheck-0.6/src/rootcheck/rootcheck.conf
rootcheck-0.6/src/rootcheck/rootcheck.h
rootcheck-0.6/src/rootcheck/run_rk_check.c
rootcheck-0.6/src/rootcheck/Makefile
rootcheck-0.6/src/rootcheck/check_open_ports.c
rootcheck-0.6/src/rootcheck/rootkit_files.txt
rootcheck-0.6/src/rootcheck/rootkit_trojans.txt
rootcheck-0.6/src/headers
rootcheck-0.6/src/headers/ar.h
rootcheck-0.6/src/headers/debug_op.h
rootcheck-0.6/src/headers/defs.h
rootcheck-0.6/src/headers/file_op.h
rootcheck-0.6/src/headers/help.h
rootcheck-0.6/src/headers/list_op.h
rootcheck-0.6/src/headers/mem_op.h
rootcheck-0.6/src/headers/mq_op.h
rootcheck-0.6/src/headers/os_err.h
rootcheck-0.6/src/headers/privsep_op.h
rootcheck-0.6/src/headers/pthreads_op.h
rootcheck-0.6/src/headers/rc.h
rootcheck-0.6/src/headers/regex_op.h
rootcheck-0.6/src/headers/sec.h
rootcheck-0.6/src/headers/shared.h
rootcheck-0.6/src/headers/sig_op.h
rootcheck-0.6/src/error_messages
rootcheck-0.6/src/error_messages/error_messages.h
rootcheck-0.6/src/Config.Make
rootcheck-0.6/src/Makeall
rootcheck-0.6/src/LOCATION
rootcheck-0.6/src/VERSION
rootcheck-0.6/Makefile
rootcheck-0.6/README
[root@localhost rootkit]# cd rootcheck-0.6
[root@localhost rootcheck-0.6]# ls
Makefile README src/
[root@localhost rootcheck-0.6]# make all
Making os_xml
make[1]: Entering directory `/root/rootkit/rootcheck-0.6/src/os_xml'
gcc -DXML_VAR=\"var\" -Wall -I../ -I../headers/ -DARGV0=\"os_xml\" -DXML_VAR=\"var\" -DOSSECHIDS -c os_xml.c os_xml_access.c os_xml_node_access.c os_xml_variables.c
ar cru os_xml.a os_xml.o os_xml_access.o os_xml_node_access.o os_xml_variables.o
ranlib os_xml.a
make[1]: Leaving directory `/root/rootkit/rootcheck-0.6/src/os_xml'
Making shared
make[1]: Entering directory `/root/rootkit/rootcheck-0.6/src/shared'
gcc -c -Wall -I../ -I../headers/ -DARGV0=\"shared-libs\" -DXML_VAR=\"var\" -DOSSECHIDS *.c
ar cru lib_shared.a *.o
ranlib lib_shared.a
make[1]: Leaving directory `/root/rootkit/rootcheck-0.6/src/shared'
Making rootcheck
make[1]: Entering directory `/root/rootkit/rootcheck-0.6/src/rootcheck'
gcc -Wall -I../ -I../headers/ -DARGV0=\"ossec-rootcheck\" -DXML_VAR=\"var\" -DOSSECHIDS *.c ../shared/lib_shared.a ../os_xml/os_xml.a -U OSSECHIDS -D_GNU_SOURCE -o ossec-rootcheck
make[1]: Leaving directory `/root/rootkit/rootcheck-0.6/src/rootcheck'
[root@localhost rootcheck-0.6]# ls
db/ Makefile ossec-rootcheck* README rootcheck.conf* src/
[root@localhost rootcheck-0.6]# cat rootcheck.conf
[root@localhost rootcheck-0.6]# ./ossec-rootcheck -c rootcheck.conf
Starting rootcheck (http://www.ossec.net/rootcheck)
Be patient, it may take a few minutes to complete...
[OK]: No presence of public rootkits detected. Analized 236 files.
[OK]: No binaries with any trojan detected. Analized 54 files
[FAILED]: File '/dev/.started' present on /dev. Possible hidden file.
[OK]: No problem found on the system. Analized 96036 files.
[OK]: No hidden process by Kernel-level rootkits.
/bin/ps is not trojaned. Analized 32768 processes.
[OK]: No kernel-level rootkit hiding any port.
Netstat is acting correctly. Analized 131072 ports.
[OK]: The following ports are open:
22 (tcp),25 (tcp),80 (tcp),111 (tcp),111 (udp),
137 (udp),138 (udp),139 (tcp),389 (tcp),
443 (tcp),445 (tcp),756 (udp),759 (udp),
762 (tcp),973 (udp),976 (tcp),1024 (udp),
1025 (tcp),1026 (udp),2049 (tcp),2049 (udp),
5335 (tcp),5353 (udp),6000 (tcp),7741 (tcp),7741 (udp),
8118 (tcp),9050 (tcp),10026 (tcp)
[OK]: No problem detected on ifconfig/ifs. Analized 2 interfaces.
From the above report only alert is '/dev/.started' which I checked
[root@localhost rootcheck-0.6]# file /dev/.started
/dev/.started: empty
[root@localhost rootcheck-0.6]# cat /dev/.started
The file /dev/.started is empty so NO Problems
Friday, May 12, 2006
Install Apache-PHP-MySQL in Linux
Dowload the Source ::
Apache 2.x - http://httpd.apache.org/download.cgi
PHP 5.x - http://us2.php.net/downloads.php
MySQL 4.1.x - http://dev.mysql.com/downloads/mysql/4.1.html#source
Install MySQL
#tar -xzvf mysql-4.1.11.tar.gz
#cd mysql-4.1.11
#./configure –prefix=/usr/local/mysql
#make
#make install
#cp support-files/my-medium.cnf /etc/my.cnf
#/usr/sbin/groupadd mysql
#/usr/sbin/useradd -g mysql mysql
#chown -R root:mysql /usr/local/mysql
#chown -R mysql:mysql /usr/local/mysql/data
#vi /etc/ld.so.conf
add the below line
/usr/local/mysql/lib/mysql
/usr/local/mysql/bin/mysqld_safe ?user=mysql &
#/usr/local/mysql/bin/mysqladmin -u root password new_password
2. Installing Apache 2.x
tar -xzvf httpd-2.0.54.tar.gz
cd httpd-2.0.54
./configure –prefix=/usr/local/apache –enable-mods-shared=all
make
make install
3. Installing PHP 5.x
tar -xzvf php-5.0.4.tar.gz
cd php-5.0.4
./configure –prefix=/usr/local/php –with-apxs2=/usr/local/apache/bin/apxs –with-mysql=/usr/local/mysql
make
make install
#cp php.ini-dist /usr/local/lib/php.ini
#vi /usr/local/apache/conf/httpd.conf
Locate the endtry AddType and enter the following
AddType application/x-httpd-php .php .phtml
AddType application/x-httpd-php .php3
AddType application/x-httpd-php .php4
AddType application/x-httpd-php .php5
#/usr/local/apache/bin/apachectl stop
#/usr/local/apache/bin/apachectl start
Finally Testing PHP
#cd /usr/local/apache/htdocs/
vi test.php
< ?
phpinfo();
?>
Check this link http://localhost/test.php in your Browser
Thursday, May 11, 2006
How TO - Linux RAID
In Linux you can use raid, redundant array of inexpensive drives, then if a hard drive fails your data is safe. Okay the fun part begins when you try to enable raid, the obvious choices are raid 1 (mirroring your data) or raid 5 (that uses part of your drives as parity protecting your data uses less space but requires a minimum of 3 drives to work). I won’t bore you with the technical details I will just show a small sample of the commands to create a raid 1, a mirror image of one drive onto a second drive.
You have two devices of approximately same size, and you want the two to be mirrors of each other. Eventually you have more devices, which you want to keep as stand-by spare-disks, that will automatically become a part of the mirror if one of the active devices break.
Set up the /etc/raidtab file like this:
raiddev /dev/md0
raid-level 1
nr-raid-disks 2
nr-spare-disks 0
persistent-superblock 1
device /dev/sdb6
raid-disk 0
device /dev/sdc5
raid-disk 1
If you have spare disks, you can add them to the end of the device specification like
device /dev/sdd5
spare-disk 0
Remember to set the nr-spare-disks entry correspondingly.
Ok, now we're all set to start initializing the RAID. The mirror must be constructed, eg. the contents (however unimportant now, since the device is still not formatted) of the two devices must be synchronized.
Issue the
mkraid /dev/md0
command to begin the mirror initialization.
Check out the /proc/mdstat file. It should tell you that the /dev/md0 device has been started, that the mirror is being reconstructed, and an ETA of the completion of the reconstruction.
Reconstruction is done using idle I/O bandwidth. So, your system should still be fairly responsive, although your disk LEDs should be glowing nicely.
The reconstruction process is transparent, so you can actually use the device even though the mirror is currently under reconstruction.
Try formatting the device, while the reconstruction is running. It will work. Also you can mount it and use it while reconstruction is running. Of Course, if the wrong disk breaks while the reconstruction is running, you're out of luck.
Thanks to these articles i ii
Saturday, May 06, 2006
Vmware installation troubles in Mandriva 2006
#vmware-config.pl
Trying to find a suitable vmmon module for your running kernel.
None of the pre-built vmmon modules for VMware Player is suitable for your
running kernel. Do you want this program to try to build the vmmon module for
your system (you need to have a C compiler installed on your system)? [yes]
I say "Yes"
Using compiler "/usr/bin/gcc". Use environment variable CC to override.
What is the location of the directory of C header files that match your running
kernel? [/usr/src/linux/include]
I "Enter"
The path "/usr/src/linux/include" is not an existing directory.
Ok I Understand I need kernel-source
So I do,
#urpmi kernel-source
This Installs 2.6.12-18mdksmp Source.
After Installing Kernel-source I do,
#vmware-config.pl
I get,
The directory of kernel headers (version 2.6.12-18mdksmp) does not match your
running kernel (version 2.6.12-12mdksmp). Even if the module were to compile
successfully, it would not load into the running kernel.
[root@localhost VMware]# uname -a
Linux localhost 2.6.12-12mdk-i686-up-4GB #1 Fri Sep 9 17:59:21 CEST 2005 i686 Intel(R) Celeron(R) M processor 1.30GHz unknown GNU/Linux
So I now DISABLE updates line on
cat /etc/urpmi/urpmi.cfg
#updates ftp://distrib-coffee.ipsl.jussieu.fr/pub/linux/MandrivaLinux/
#official/updates/2006.0/main_updates {
# hdlist: hdlist.updates.cz
# key-ids: 22458a98
# list: list.updates
# synthesis
# update
# with_hdlist: media_info/synthesis.hdlist.cz
#}
and Now again
# urpmi kernel-source
This time it installs the proper source
kernel-source-2.6-2.6.12-12mdk
This time it installs VMware Sucessfully
#vmware-config.pl
Starting VMware services:
Virtual machine monitor [ OK ]
Virtual ethernet [ OK ]
Bridged networking on /dev/vmnet0 [FAILED]
Host-only networking on /dev/vmnet1 (background) [ OK ]
Host-only networking on /dev/vmnet8 (background) [ OK ]
NAT service on /dev/vmnet8 [ OK ]
The configuration of VMware Workstation 5.0.0 build-13124 for Linux for this
running kernel completed successfully.
You can now run VMware Workstation by invoking the following command:
"/usr/bin/vmware".
Enjoy,
--the VMware team
[root@localhost VMware]#
Monday, May 01, 2006
Replicating MySQL - Database servers
MySQL has a replication feature to keep databases on different servers synchronized. It uses what is known as log replay, meaning that a transaction log is created on the master server which is then read by a slave server and applied to the database. As with the Web servers, we designate one database server as the master -- call it db1 to match the naming convention we used earlier -- and the other one, db2, is the slave.
To set up the master, first create a replication account -- a user ID defined in MySQL, not a system account, that is used by the slaves to authenticate to the master in order to read the logs. For simplicity, I'll create a MySQL user called "copy" with a password of "copypass." You will need a better password for a production system. This MySQL command creates the copy user and gives it the necessary privileges:
GRANT REPLICATION SLAVE, REPLICATION CLIENT ON *.* TO copy@"10.1.0.0/255.255.0.0" IDENTIFIED BY 'copypass';
Next, edit the MySQL configuration file, /etc/my.cnf, and add these entries in the [mysqld] section:
# Replication Master Server (default)
# binary logging is required for replication
log-bin
# required unique id
server-id = 1
The log-bin entry enables the binary log file required for replication, and the server-id of 1 identifies this server as the master. After editing the file, restart MySQL. You should see the new binary log file in the MySQL directory with the default name of $HOSTNAME-bin.001. MySQL will create new log files as needed.
To set up the slave, edit its /etc/my.cnf file and add these entries in the [mysqld] section:
# required unique id
server-id = 2
#
# The replication master for this slave - required
# (replace with the actual IP of the master database server)
master-host = 10.1.1.21
#
# The username the slave will use for authentication when connecting
# to the master - required
master-user = copy
# The password the slave will authenticate with when connecting to
# the master - required
master-password = copypass
# How often to retry lost connections to the master
master-connect-retry = 15
# binary logging - not required for slaves, but recommended
log-bin
While it's not required, it is good planning to create the MySQL replication user (copy in our example) on each slave in case it needs to take over from the master in an emergency.
Restart MySQL on the slave and it will attempt to connect to the master and begin replicating transactions. When replication is started for the first time (even unsuccessfully), the slave will create a master.info file with all the replication settings in the default database directory, usually /var/lib/mysql.
To recap the database configuration steps,
1. Create a MySQL replication user on the master and, optionally, on the slave.
2. Grant privileges to the replication user.
3. Edit /etc/my.cnf on master and restart MySQL.
4. Edit /etc/my.cnf on the slave(s) and restart MySQL.
How to tell if replication is working
On the master, log in to the MySQL monitor and run show master status:
mysql> show master status \G;
*************************** 1. row ***************************
File: master-bin.006
Position: 73
Binlog_do_db:
Binlog_ignore_db:
1 row in set (0.00 sec)
On the slave, log in to the MySQL monitor and run show slave status:
mysql> show slave status \G;
*************************** 1. row ***************************
Master_Host: master.foo.com
Master_User: copy
Master_Port: 3306
Connect_retry: 15
Master_Log_File: intranet-bin.006
[snip]
Slave_IO_Running: Yes
Slave_MySQL_Running: Yes
The most important fields are Slave_IO_Running and Slave_MySQL_Running. They should both have values of Yes. Of course, the real test is the execute a write query to a database on the master and see if the results appear on the slave. When replication is working, slave updates usually appear within milliseconds.
Recovering from a database error
If the slave database server loses power or the network connection, it will no longer be able to stay synchronized with the master. If the outage is short, replication should pick up where it left off. However, if a serious error occurs on the slave, the safest way to get replication working again is to:
1. Stop MySQL on the master and slave.
2. Dump the master database.
3. Reload the database on the slave.
4. Start MySQL on the master.
5. Start MySQL on the slave.
Depending on the nature of the problem, a full reload on the slave may not be necessary, but this procedure should always work.
If the problem is with the master database server and it will be down for a while, you can reconfigure the slave as the master by updating its IP address and /etc/my.cnf file. All Web servers then must be changed to read from the new master. When the old master is repaired, it can be brought up as a slave server and the Web
Note : MySQL 5 introduced a special storage engine designed for distributed databases called NDB that provides another option. For more in-depth information on MySQL clustering, see the MySQL Web site or High Performance MySQL by Jeremy Zawodny and Derek Balling.
Clusters make it possible to scale a Web application to handle a tremendous number of requests. As traffic builds, network bandwidth also becomes an issue. Top-tier hosting providers can supply the redundancy and bandwidth required for scaling.
This article is taken from here
Subscribe to:
Posts (Atom)