In unix like operating systems we have the 'screen' utility,
so usefull as easy to use. In cases where you need to
compile a kernel in the background in a remote server
(where the connection can get lost), download a file or
do some critical operation without the risk of loosing
the network connection to the server, the 'screen' utility
comes handy.
Run it just writing its name:
#screen
This creates a virtual shell, a virtual terminal,
for those (like me) that love virtualization :-)
Now you see a new shell, type some commands,
leave a 'top' running, and type:
ctrl+a+c (this creates a new window, like a new shell).
How to go back to the window with the 'top' ?
Type ctrl+a+n (this jumps to the next window,
in this case, the first one).
I dont know of a limit of shells you can
create with "ctrl+a+c".
You jump backward to the previous window
with "ctrl+a+p".
Split the current 'screen' window in multiple
windows with "ctrl+a+S"
Jump between splitted windows with "ctrl+a+TAB".
And, if you need to send the the terminal the "ctrl+a" signal, press "ctrl+a+a".
Now... the real magic, how to leave this process running in the background and how to recover the terminal after a connection loose ?
Press ctrl+a+d to disconnect from 'screen' and leave
all the terminals in the background, these processes
will survive as i said, a disconnection, so you can
disconnect from that server and come back in two days
that screen will be still there.
This shows something like:
[root@sriram ~]# screen -ls
There is a screen on:
2131.pts-1.sriram (Detached)
1 Socket in /var/run/screen/S-root.
To re-connect to screen write:
[root@sriram ~]# screen -r 2131.pts-1.sriram
And you are back in the screen terminals.
I hope it was usefull, please leave me a
message with your experience or new tricks.
Saturday, December 30, 2006
Sunday, December 24, 2006
Failover routing - ISP switch
a small shell script that ping a test ip and if it is
unreachable switch to the other gateway.
Schedule this script to run every minute or so from cron.
not messing with your routing table when connected/disconnected,
esp. PPP is know to be quite unpolite when dealing with routes.
You probably want some sort of test to see if the new path is
working as well. Other concerns may be iptables/tc reloading
and stuff like that.
unreachable switch to the other gateway.
Schedule this script to run every minute or so from cron.
#!/bin/bashThis script requires that both your ISP's are pre-configured and are
GW1="192.168.10.254"
GW2="192.168.55.254"
TESTIP="192.71.220.10" # Any reliable Internet ip that responds to ping.
CURGW=`/sbin/route -n |awk '/^0.0.0.0/ {print $2 }'`
if ping -w2 -c3 $TESTIP >/dev/null 2>&1; then
echo "Active ISP is Ok."
else
if [ "$CURGW" = "$GW1" ]; then
NEWGW="$GW2"
else
NEWGW="$GW1"
fi
/sbin/route del default
/sbin/route add default gw $NEWGW
fi
not messing with your routing table when connected/disconnected,
esp. PPP is know to be quite unpolite when dealing with routes.
You probably want some sort of test to see if the new path is
working as well. Other concerns may be iptables/tc reloading
and stuff like that.
Wednesday, November 08, 2006
Using NIS commands
NIS+ provides a full set of commands for administering a namespace.
nisaddcred Creates credentials for NIS+ principals and stores
them in the cred table.
nisaddent Adds information from /etc files or NIS maps into
NIS+ tables.
niscat Displays the contents of NIS+ tables.
nischgrp Changes the group owner of an NIS+ object.
nischmod Changes an object's access rights.
nischown Changes the owner of an NIS+ object.
nischttl Changes an NIS+ object's time-to-live value.
nisdefaults Lists an NIS+ object's default values: domain name,
group name, workstation name, NIS+ principal name,
access rights, directory search path, and time-to-live.
nisgrep Searches for entries in an NIS+ table.
nisgrpadm Creates or destroys an NIS+ group, or displays a list of its members.
Also adds members to a group, removes them, or tests them for
membership in the group.
nisinit Initializes an NIS+ client or server.
nisln Creates a symbolic link between two NIS+ objects.
nisls Lists the contents of an NIS+ directory.
nismatch Searches for entries in an NIS+ table.
nismkdir Creates an NIS+ directory and specifies its master and replica servers.
nismkuser Creates an NIS+ user.
| nisrm | Removes NIS+ objects (except directories) from the namespace. |
| nisrmdir | Removes NIS+ directories and replicas from the namespace. |
| nisrmuser | Removes an NIS+ user. |
| nissetup | Creates org_dir and groups_dir directories and a complete set of (unpopulated) NIS+ tables for an NIS+ domain. |
| nisshowcache | Lists the contents of the NIS+ shared cache maintained by the NIS+ cache manager. |
| nistbladm | Creates or deletes NIS+ tables, and adds, modifies or deletes entries in an NIS+ table. |
| nisupdkeys | Updates the public keys stored in an NIS+ object. |
| passwd | Changes password information stored in the NIS+ passwd table. |
Saturday, October 21, 2006
Build your own RPM
Many a times while installing packages in linux , we have two options
either a rpm package or a tar file which needs to be uncompressed and
running commands like configure, make , make install.
I had just downloaded a Linux Flash Plugin which was in a tar format.
I followed the below steps to pack it as RPM :
1) cd /usr/src/redhat/SOURCES and copy
your tar(Flash-7.tar.gz) file here, make sure
while copying the tar file is in Name-Version format.
2) create a flash.spec file on the above path.
3) run rpmbuild -ba and the spec file
Step 1 :
cd /usr/src/redhat/SOURCES and I copied the tar file
as Flash-7.tar.gz
Step 2: Flash.spec file
Summary: GNU Srirams Flash
Name: Flash
Version: 7
Release: 1
Source0: %{name}-%{version}.tar.gz
License: GPL
Group: Multimedia
%description
Allows you to run Flash based programs in Linux
%prep
%setup -q
%build
./flashplayer-installer
%install
%files
%defattr(-,root,root)
Step 3 : Building the RPM
[root@sriram SOURCES]# rpmbuild -ba flash.spec
Executing(%prep): /bin/sh -e /var/tmp/rpm-tmp.31439
+ umask 022
+ cd /usr/src/redhat/BUILD
+ LANG=C
+ export LANG
+ unset DISPLAY
+ cd /usr/src/redhat/BUILD
+ rm -rf Flash-7
+ tar -xf /usr/src/redhat/SOURCES/Flash-7.tar.gz
+ cd Flash-7
++ /usr/bin/id -u
+ '[' 0 = 0 ']'
+ /bin/chown -Rhf root .
++ /usr/bin/id -u
+ '[' 0 = 0 ']'
+ /bin/chgrp -Rhf root .
+ /bin/chmod -Rf a+rX,u+w,g-w,o-w .
+ exit 0
Executing(%build): /bin/sh -e /var/tmp/rpm-tmp.31439
+ umask 022
+ cd /usr/src/redhat/BUILD
+ cd Flash-7
+ LANG=C
+ export LANG
+ unset DISPLAY
+ ./flashplayer-installer
Copyright(C) 2002-2003 Macromedia, Inc. All rights reserved.
Macromedia Flash Player 7 for Linux
This will run the flashplayer-installer
The Macromedia Flash Player installation is complete.
+ exit 0
Executing(%install): /bin/sh -e /var/tmp/rpm-tmp.17690
+ umask 022
+ cd /usr/src/redhat/BUILD
+ cd Flash-7
+ LANG=C
+ export LANG
+ unset DISPLAY
+ /usr/lib/rpm/find-debuginfo.sh /usr/src/redhat/BUILD/Flash-7
0 blocks
find: /usr/lib/debug: No such file or directory
+ /usr/lib/rpm/redhat/brp-compress
+ /usr/lib/rpm/redhat/brp-strip-static-archive /usr/bin/strip
+ /usr/lib/rpm/redhat/brp-strip-comment-note /usr/bin/strip /usr/bin/objdump
+ /usr/lib/rpm/brp-python-bytecompile
Processing files: Flash-7-1
Processing files: Flash-debuginfo-7-1
Checking for unpackaged file(s): /usr/lib/rpm/check-files %{buildroot}
Wrote: /usr/src/redhat/SRPMS/Flash-7-1.src.rpm
Wrote: /usr/src/redhat/RPMS/i386/Flash-7-1.i386.rpm
Wrote: /usr/src/redhat/RPMS/i386/Flash-debuginfo-7-1.i386.rpm
[root@sriram SOURCES]# rpm -ivh Flash-7-1.i386.rpm
Preparing... ############################## [100%]
1:Flash ############################## [100%]
[root@sriram SOURCES]# rpm -qa |grep Flash
Flash-7-1
Monday, October 16, 2006
Subversion Quick Reference
Subversion Quick reference
Check out code from a remote web repository
svn checkout http://svn.collab.net/repos/svn/trunk subversion
OR
svn co http://svn.collab.net/repos/svn/trunk subversion
This command will check out a working copy of the subversion
source code into a new subdirectory called subversion.
Note, this is just an example, checking out the subversion source
could take a while, so don’t do it. You would generally substitute
the URL with the one you are trying to access, and change the
working directory to something different.
svn checkout –username myuser –password ……
On the majority of the commands you can set the –username
parameter and the –pasword to help automate things,
instead of being prompted for them. Once you create a
local working copy, your client should really cache that
information, however.
Basic Subversion Commands
svn update
Run this in your project directory to get the latest
changes from the source control server.
svn update -r 123
Run this in your project directory to update to the specific revision 123
svn stat
OR
svn st
Run this in your project directory, gives you the status of all the
files and directories. If it returns nothing, then you are in sync.
M before a file means modified, and ? means the file is not in source control.
svn revert
This will show the differences between filename.cpp and the
working copy. This is most useful after running an svn stat
and seeing that the file is modified. You can then run this command
to see what the differences are.
svn revert filename.cpp
This will revert all changes you have made to filename.cpp
back to the copy in the repository.
svn revert -R *
This will revert all changes you have made to the entire
project back to the repository version.
svn -v list
This will list the files in source control for the current
workspace directory.
svn -v list http://svn.collab.net/repos/svn/trunk
This will list all files in source control at the particular subversion
repository URL. Fairly useful if you want to see what the
structure is before doing a checkout.
svn info
Gives you info about the current working copy,
including the URL of the repository it points to, and the last changed date/author.
svn commit -m “Adding new function” filename.cpp
Commit the changes in filename.cpp, and give it a useful message.
Using the messages is highly important down the road when
you want to figure out what a particular change did. Make sure you use them.
svn commit -m “Adding lots of new functions”
Use this function without the filename to commit all changes to all files.
This is useful when you have a set of changes spanning
multiple files. (common)
svn log
svn log filename.cpp
svn log –limit 5 http://svn.collab.net/repos/svn/trunk
Use this function to take a look at the log messages.
The first one is for the entire working copy,
the last one shows just the last 5 log messages on a web repository.
svn add newfile.cpp
Add a file or directory to version control. Note that you still
have to commit to actually send the file to the source control server.
You also can only use this command from within a working
copy directory, meaning if you haven’t used source control
on that directory you will need to import it first.
svn move filename.cpp newfilename.cpp
Allows you to rename or move files within source control.
You can either use filenames in your local repository,
or you can even pass in two URL locations to have it
be moved/renamed on the server side.
svn copy MySource MyNewSource
Allows you to copy a file or directory, either with local files,
or on the repository using the URL syntax.
svn delete filename.cpp
Deletes the filename from source control.
Note that the filename will still exist in older revisions,
but will be deleted from the current revision
svn blame filename.cpp
This is one of my favorite commands in subversion.
This lists out the file, giving the revision and person
who changed every single line in the file. Very useful
Import Code into Subversion
svn import -m “Importing the files” MySource
http://svn.theserver.net/svnroot/mysource
mports the directory MySource and all files contained
within into the subversion server. The URL can be several levels deep or more.
Note: once you import a source code directory, you should
remove the directory and then checkout the directory so that
you can have a proper working copy. Oh, and back up your
files before you delete them. I don’t want any nasty emails
about how you lost source code.
For Administrators
svnadmin create /svnroot/RepositoryName
Creates a new repository at RepositoryName.
If you are using the URL model for accessing your site,
make sure that the location you create it at is accessible
via your local web server.
svnadmin hotcopy /svnroot/reponame /backups/reponame
Makes a “Hot Copy” of the repository, which means a copy of
the repository that can be instantly reusable. This method seems
to work pretty well for full backups.
svn copy -m “Making a new branch for that new feature”
http://svn.server.com/svnroot/trunk
http://svn.server.com/branches/johnnysbranch
Make a branch copy of the trunk into a seperate branch.
This should only be used by power users or people that
know what they are doing.
svn copy -m “Tagging version 1.0″ http://svn.server.com/svnroot/trunk http://svn.server.com/svnroot/versions/version_1.0
Tag a version of the application. This uses the same copy
command that the branching does, and it’s really the same
underlying operation. Copying in subversion does not actually
make a new copy of the file, it just tags the current version.
Once changes are made, then the changes would be stored
to the file seperately.
Saturday, October 14, 2006
Linux boot script
Some days back I had written a script to stop/start
application as linux boots.
Instead of adding the script manually , you could try this :
On Debian
update-rc.d is the debian utility to install and remove
System-V style init script links.
#Create the script
Like this
On Redhat
chkconfig on RedHat Linux Systems:
Add this 2 lines at the beginning of script
Copy the script to /etc/rc.d/init.d/
When added to the boot process using the "chkconfig --add script-name"
command the start order/priority will be set to 80 while the stop/shutdown
order will be set to 15. The process will be added to runlevels 3, 4 and 5.
This is enabled by generating links from the location of the script
(/etc/rc.d/init.d/) to the directory for the appropriate run level:
/etc/rc.d/rc#.d/. The file name in the run level directory will reflect if it
is used for boot (starts with an "S") or shutdown (starts with a "K")
application as linux boots.
Instead of adding the script manually , you could try this :
On Debian
update-rc.d is the debian utility to install and remove
System-V style init script links.
#Create the script
Like this
# make it executable
chmod a+x
# copy the script to /etc/init.d and run the below command
update-rc.d script defaults
# To Erase:
update-rc.d -f script remove
On Redhat
chkconfig on RedHat Linux Systems:
Add this 2 lines at the beginning of script
# chkconfig: 345 85 15Set execute permission to script ===> chmod +x script name
# description: Description of program
This will add to runlevel 3,4 and 5 , Start order priority
will be set to 85 while Stop/Shutdown order will be set to 15
Copy the script to /etc/rc.d/init.d/
When added to the boot process using the "chkconfig --add script-name"
command the start order/priority will be set to 80 while the stop/shutdown
order will be set to 15. The process will be added to runlevels 3, 4 and 5.
This is enabled by generating links from the location of the script
(/etc/rc.d/init.d/) to the directory for the appropriate run level:
/etc/rc.d/rc#.d/. The file name in the run level directory will reflect if it
is used for boot (starts with an "S") or shutdown (starts with a "K")
Thursday, September 28, 2006
Wine - Running exe on Linux
If you feel the need to run some specific windows application(*.exe)
on linux, then wine may be very full.
Steps I followed in Fedora core 5 to run firefox.exe is given below:
[root@sriram sriram]# yum -y install wine
Dependencies Resolved
Transaction Summary
===========================================
Install 10 Package(s)
Update 0 Package(s)
Remove 0 Package(s)
Total download size: 11 M
Downloading Packages:
(1/10): wine-tools-0.9.20 100% |=============| 535 kB 00:55
(2/10): wine-esd-0.9.20-1 100% |============| 32 kB 00:02
(3/10): wine-nas-0.9.20-1 100 |=============| 20 kB 00:01
(4/10): wine-capi-0.9.20- 100% |============| 21 kB 00:00
(5/10): wine-jack-0.9.20- 100% |============| 21 kB 00:02
(6/10): wine-cms-0.9.20-1 100% |===========| 34 kB 00:03
(7/10): wine-core-0.9.20- 100% |============| 9.8 MB 18:42
(8/10): wine-0.9.20-1.fc5 100% |============| 16 kB 00:01
(9/10): wine-ldap-0.9.20- 100% |============| 82 kB 00:08
(10/10): wine-twain-0.9.2 100% |============| 25 kB 00:01
warning: rpmts_HdrFromFdno: Header V3 DSA signature:
NOKEY, key ID 1ac70ce6
Public key for wine-tools-0.9.20-1.fc5.i386.rpm is not installed
Retrieving GPG key from file:///etc/pki/rpm-gpg/
RPM-GPG-KEY-fedora-extras
Importing GPG key 0x1AC70CE6 "Fedora Project
"
Key imported successfully
Running Transaction Test
Finished Transaction Test
Transaction Test Succeeded
Running Transaction
Installing: wine-core ####################### [ 1/10]
Installing: wine-tools ####################### [ 2/10]
Installing: wine-esd ####################### [ 3/10]
Installing: wine-nas ####################### [ 4/10]
Installing: wine-capi ####################### [ 5/10]
Installing: wine-jack ####################### [ 6/10]
Installing: wine-cms ####################### [ 7/10]
Installing: wine-ldap ####################### [ 8/10]
Installing: wine-twain ####################### [ 9/10]
Installing: wine ####################### [10/10]
Installed: wine.i386 0:0.9.20-1.fc5
Dependency Installed: wine-capi.i386 0:0.9.20-1.fc5 wine-cms.i386 0:0.9.20-1.fc5
wine-core.i386 0:0.9.20-1.fc5 wine-esd.i386 0:0.9.20-1.fc5 wine-jack.i386 0:0.9
.20-1.fc5 wine-ldap.i386 0:0.9.20-1.fc5 wine-nas.i386 0:0.9.20-1.fc5 wine-tools.
i386 0:0.9.20-1.fc5 wine-twain.i386 0:0.9.20-1.fc5
Complete!
Wine Installation Directory :
[root@sriram sriram]# cd /root/.wine
[root@sriram .wine]# ls
dosdevices drive_c regba80000.tmp system.reg userdef.reg user.reg
[root@sriram c:]# pwd
/root/.wine/dosdevices/c:
I downloaded Firefox_Setup 1.5.0.6.exe for windows in
/root/.wine/dosdevices/c:
To install firefox for windows
[root@sriram c:]# wine Firefox_Setup 1.5.0.6.exe
(Follow procedure as you would follow in windows).
This will create 2 directories :
1) Program Files
2) windows
Now to execute Firefox for windows
#cd /root/.wine/dosdevices/c:/Program Files/Mozilla Firefox
#wine firefox.exe
This will start the firefox version of windows.
on linux, then wine may be very full.
Steps I followed in Fedora core 5 to run firefox.exe is given below:
[root@sriram sriram]# yum -y install wine
Dependencies Resolved
Transaction Summary
===========================================
Install 10 Package(s)
Update 0 Package(s)
Remove 0 Package(s)
Total download size: 11 M
Downloading Packages:
(1/10): wine-tools-0.9.20 100% |=============| 535 kB 00:55
(2/10): wine-esd-0.9.20-1 100% |============| 32 kB 00:02
(3/10): wine-nas-0.9.20-1 100 |=============| 20 kB 00:01
(4/10): wine-capi-0.9.20- 100% |============| 21 kB 00:00
(5/10): wine-jack-0.9.20- 100% |============| 21 kB 00:02
(6/10): wine-cms-0.9.20-1 100% |===========| 34 kB 00:03
(7/10): wine-core-0.9.20- 100% |============| 9.8 MB 18:42
(8/10): wine-0.9.20-1.fc5 100% |============| 16 kB 00:01
(9/10): wine-ldap-0.9.20- 100% |============| 82 kB 00:08
(10/10): wine-twain-0.9.2 100% |============| 25 kB 00:01
warning: rpmts_HdrFromFdno: Header V3 DSA signature:
NOKEY, key ID 1ac70ce6
Public key for wine-tools-0.9.20-1.fc5.i386.rpm is not installed
Retrieving GPG key from file:///etc/pki/rpm-gpg/
RPM-GPG-KEY-fedora-extras
Importing GPG key 0x1AC70CE6 "Fedora Project
Key imported successfully
Running Transaction Test
Finished Transaction Test
Transaction Test Succeeded
Running Transaction
Installing: wine-core ####################### [ 1/10]
Installing: wine-tools ####################### [ 2/10]
Installing: wine-esd ####################### [ 3/10]
Installing: wine-nas ####################### [ 4/10]
Installing: wine-capi ####################### [ 5/10]
Installing: wine-jack ####################### [ 6/10]
Installing: wine-cms ####################### [ 7/10]
Installing: wine-ldap ####################### [ 8/10]
Installing: wine-twain ####################### [ 9/10]
Installing: wine ####################### [10/10]
Installed: wine.i386 0:0.9.20-1.fc5
Dependency Installed: wine-capi.i386 0:0.9.20-1.fc5 wine-cms.i386 0:0.9.20-1.fc5
wine-core.i386 0:0.9.20-1.fc5 wine-esd.i386 0:0.9.20-1.fc5 wine-jack.i386 0:0.9
.20-1.fc5 wine-ldap.i386 0:0.9.20-1.fc5 wine-nas.i386 0:0.9.20-1.fc5 wine-tools.
i386 0:0.9.20-1.fc5 wine-twain.i386 0:0.9.20-1.fc5
Complete!
Wine Installation Directory :
[root@sriram sriram]# cd /root/.wine
[root@sriram .wine]# ls
dosdevices drive_c regba80000.tmp system.reg userdef.reg user.reg
[root@sriram c:]# pwd
/root/.wine/dosdevices/c:
I downloaded Firefox_Setup 1.5.0.6.exe for windows in
/root/.wine/dosdevices/c:
To install firefox for windows
[root@sriram c:]# wine Firefox_Setup 1.5.0.6.exe
(Follow procedure as you would follow in windows).
This will create 2 directories :
1) Program Files
2) windows
Now to execute Firefox for windows
#cd /root/.wine/dosdevices/c:/Program Files/Mozilla Firefox
#wine firefox.exe
This will start the firefox version of windows.
Saturday, September 23, 2006
How Linux Boots
The BIOS loads and execute the first 512 bytes off the disk
(/dev/hda), a.k.a. the Master Boot Record (MBR)
The boot loader executes the first 512 bytes of the partition that
you selected (if more than one is available).
Advanced boot loaders like Grub or System Commander offer more features
than the DOS boot loader. Some boot loaders save their configuration in
the MBR (hence the need to remember to run the lilo command after
editing it to save your changes to the master boot record on disk), while others
save their data in a partition
The partition loader now decompresses the kernel in RAM, and runs it
The kernel initialises devices, loads the root partition,
loads the /sbin/init process (PID=1) that reads its configuration
information from /etc/inittab to know which boot scripts to run
and at which run-level to start, and which processes to spawn.
The actual scripts are in /etc/rc.d/init.d, and /etc/rc.d/rc#.d
only contains links
Init launches Getty to open consoles, and launches Login
to present the user with a logon prompt
Note that once the Linux kernel has been loaded by lilo,
it looks in "all the usual places" for init and runs the first copy it finds.
More information: Inside the Linux boot process by Tim Jones
Flash Plugin with Fedora Core release 5 (Bordeaux)
A week back I installed Fedora Core 5, but one thing that
kept annoying was the Flash Plugins for Mozilla Firefox,
It would not allow me to view flash sites even after I installed
the Flash Player 7 for Linux.
So to overcome that heres what we need to do :
Step 1
Step 2
I have pasted below the Installations given in README file
for Flash Plugin 7.
Installation
------------
To install the Plug-in Player for Linux via an install script,
follow these directions:
- This installer is script-based and cannot be run from a GUI.
- Uncompress install_flash_player_7_linux.tar.gz.
A directory called install_flash_player_7_linux
is created. Navigate to this directory.
- From the command line,
type ./flashplayer-installer to run the installer.
The installer will instruct you to shut down your browser(s).
- Once the installation is complete, the plug-in will be installed in your
Mozilla browser. To verify,
choose Help > About Plug-ins from the browser's menu.
To manually install the Plug-in Player for Linux,
- Copy the following files to your browser's plugins folder:
libflashplayer.so
flashplayer.xpt
My Mozilla Plugin directory was here :
/usr/lib/mozilla-1.7.12
Sunday, September 10, 2006
Playing Realplayer Audio in Linux Mozilla Firefox
There are some music sites where you need
realplayer plugins to be configured on your (Mozilla Firefox/Linux)
browser to play songs :
I did the following to get this working :
1) Download and Install RealPlayer10G RPM from
http://www.real.com/linux/
2)Once you Install RealPlayer
Copy nphelix.so to your Mozilla plugins directory
and nphelix.xpt to your Mozilla components directory.
Heres the Path I copied from :
(I use Fedora Core release 5 (Bordeaux) )
[root@sriram sriram]# cp /usr/local/RealPlayer/mozilla/nphelix.xpt
/usr/lib/mozilla-1.7.12/components/
[root@sriram sriram]# cp /usr/local/RealPlayer/mozilla/nphelix.so
/usr/lib/mozilla-1.7.12/plugins/
Restart the browser to use the Music Site and see now if this works.
Thursday, August 31, 2006
Creating a rc3.d Script
One of my task for the day was to automate Jira that,
I have discussed here, By way of starting of Automatically
everytime the server is rebooted.
Previously I would start it by way of
/opt/Jira/atlassian-jira-standard-3.6.3-standalone/bin/startup.sh
I was told to create a script that could be added
to rc3.d (runlevel 3)
To do this you will need to name your script either with K or S
K - Kill a Process
S - Start a Process
and you will have to copy the script like say in my case,
I wanted the script to start everytime the server reboots
So I had given it S92100Jira.sh
and this was copied to /etc/rc3.d, by doing this it will
create a link to /etc/rc.d/init.d/Jira.sh
Below is the script that starts jira by way of
To Start
/etc/rc.d/init.d/Jira.sh start
To Stop
/etc/rc.d/init.d/Jira.sh stop
____________________________________________________
#!/bin/bash
#
# Run-level Startup script for the Jira Instance and Listener
#
# chkconfig: 345 91 19
# description: Startup/Shutdown Jira listener and instance
export JAVA_HOME=/usr/java/jdk1.5.0_06/
JIRA_HOME="/opt/Jira/atlassian-jira-enterprise-3.6.3-standalone"
# if the executables do not exist -- display error
if [ ! -f $JIRA_HOME/bin/startup.sh -o ! -d $JIRA_HOME ]
then
echo "Jira startup: cannot start"
exit 1
fi
then
echo "Jira startup: cannot start"
exit 1
fi
# depending on parameter -- startup, shutdown, restart
# of the instance and listener or usage display
# of the instance and listener or usage display
case "$1" in
start)
# Jira listener and instance startup
echo -n "Starting Jira: "
"$JIRA_HOME/bin/startup.sh"
start)
# Jira listener and instance startup
echo -n "Starting Jira: "
"$JIRA_HOME/bin/startup.sh"
touch /opt/Jira/jira.lock
echo "OK"
;;
stop)
# Jira listener and instance shutdown
echo -n "Shutdown Jira: "
"$JIRA_HOME/bin/shutdown.sh"
rm -f /opt/Jira/jira.lock
echo "OK"
;;
reload|restart)
$0 stop
$0 start
echo "OK"
;;
stop)
# Jira listener and instance shutdown
echo -n "Shutdown Jira: "
"$JIRA_HOME/bin/shutdown.sh"
rm -f /opt/Jira/jira.lock
echo "OK"
;;
reload|restart)
$0 stop
$0 start
*)
echo "Usage: $0 start|stop|restart|reload"
exit 1
esac
exit 0
_______________________________________________________
echo "Usage: $0 start|stop|restart|reload"
exit 1
esac
exit 0
_______________________________________________________
Tuesday, August 22, 2006
How to install phpMyAdmin (a utility written in PHP for mySQL server adminstration) on Linux.
Written By Rick Nicholas
phpMyAdmin is a utility written in PHP which is intended to aid in the administration of a MySQL server, either locally, or over the WWW. It is maintained through the hard work and dedication of the folks at The phpMyAdmin project , and is currently available in 47 different languages.
Some of its current capabilities include the ability to create and drop databases, create , drop, and alter tables, execute SQL statements, delete, edit, and add fields, manage keys on fields, and manage privileges. In addition, it has the ability to export your data in a number of different formats. phpMyAdmin is an excellent tool and will make the life of any MySQL database administrator much more enjoyable.
This short tutorial assumes you already have Apache, MySQL, and PHP installed correctly and functioning, and will not cover those installations. Also, the machine being used for this example is running Fedora Core 1 , so your mileage may vary depending on your Linux distro of choice and how the above mentioned packages were installed, however, unless you did something strange, you should find most installs similar. Lastly, it assumes you can use a text editor for basic editing tasks.
So lets get started !
Installation
First things first, we need to get the latest version of phpMyAdmin, at the time this tutorial was written the latest stable version was 2.5.5-pl1 , and you can get it at;
The phpMyAdmin Home Page
Grab the download, then grab a terminal window and do the following;
Change to the directory where you saved the downloaded file , such as;
$cd mydownloads
Cool, now we need to move the file to the root directory of your Apache webserver, which is usually /usr/local/apache/htdocs , also, root usually owns the Apache directory structure so you'll need to do the rest as root, so;
$su
$password
Now, lets move the file to where we need it;
#mv phpMyAdmin-2.5.5-pl1.tar.gz /usr/local/apache/htdocs
Done, now make the Apache root directory your working directory;
#cd /usr/local/apache/htdocs
Cool, now lets unpack the file;
#tar -zxf phpMyAdmin-2.5.5-pl1.tar.gz
That will take a second, then, when the machine returns the prompt, do a directory listing;
#ls
You should see a new directory which has been created called phpMyAdmin-2.5.5-pl1 , assuming you do go ahead and get rid of the original file; #rm phpMyAdmin-2.5.5-pl1.tar.gz
Now, the new directory name is a bit long, and definatley not something you want to type in all the time, so lets make it easier;
#mv phpMyAdmin-2.5.5-pl1 phpmyadmin
Cool, now you've renamed the directory to something a little easier to remember, now make that your working directory;
#cd phpmyadmin
Configuration Now, what we need to do is edit the config.inc.php file so it works with your setup. So using vi, or whatever your favorite editor happens to be, open config.inc.php , find the following lines, and edit them as appropriate for your setup;
$cfg['PmaAbsoluteUri'] = ''; (Default)
$cfg['PmaAbsoluteUri'] = ' http://www.yoursite.com/phpmyadmin/'; (Edited)
$cfg['Servers'][$i]['user'] = 'root'; (Default)
$cfg['Servers'][$i]['user'] = 'your_MySQL_root_user'; (Edited)
$cfg['Servers'][$i]['password'] = ''; (Default)
$cfg['Servers'][$i]['password'] = 'your_password'; (Edited)
Thats it, save the file and close it.
Now, lets see if it works, open a browser and point it to phpMyAdmin by using your site info such as www.yoursite.com/phpmyadmin, or, localhost/phpmyadmin if you are only working locally. If all is well you should see the welcome screen for phpMyAdmin !, if you don't, then check your logs and remember, Google is your friend. If you see a page full of PHP errors, make sure you used the correct username and password when you edited the lines mentioned above.
Now, knowing what this cool program is capable of, its probably not something you want just anyone to be able to access, luckily we can take care of that very easily using Apache 's authentication process, so lets do it !
Still as root make a directory to store the password file we will be creating;
#mkdir /usr/local/apache/passwd
Now, lets create the file and add an allowed user;
#/usr/local/apache/bin/htpasswd -c /usr/local/apache/passwd/authpass myphp
htpasswd will prompt you for the password you would like to assign to this user, once entered, it will create the file authpass and populate it with the information for the user called myphp .
You can use whatever names you like, this is only an example.
Now the final step, change to your Apache configuration directory;
#cd /usr/local/apache/conf
And again using your favorite editor, open the file named httpd.conf and find the following section;
Options FollowSymLinks
AllowOverride None
Directly under this section add the following (assuming you used the names from the example above);
AuthType Basic
AuthName "myphp"
AuthUserFile /usr/local/apache/passwd/authpass
Require user myphp
Thats it, save the file and close it, then restart Apache by issuing the following command
#/usr/local/apache/bin/apachectl restart
Perfect, now fire up your browser again and point it back to your phpMyAdmin site, this time you should be prompted for a username and password before being allowed access to the site. Enter the required information, and you are in business !.
That brings us to the end of this tutorial, hopefully you found this information helpful, and Good Luck !
Saturday, August 19, 2006
Bash Script for downloading and converting .flv files from YouTube to Mpeg
Make sure you have ffmpeg installed to be able to convert your .flv files to .mpg
Heres the script,
[root@localhost youtube]# cat yt.sh
#!/bin/bash
BASEURL="http://youtube.com/get_video.php?" ; read -p "YouTube URL? " ORIGURL ; read -p "Desired path/filename? " OUTFILE
wget -c -S -O ${OUTFILE}.flv ${BASEURL}`curl -s ${ORIGURL} | grep player2.swf | cut -f2 -d? | cut -f1 -d\"` && ffmpeg -i ${OUTFILE}.flv -ab 56 -ar 22050 -b 500 -s 320x240 ${OUTFILE}.mpg && exit 0
[root@localhost youtube]#
Heres the Output,
[root@localhost youtube]# sh yt.sh
YouTube URL? http://www.youtube.com/watch?v=hNa32mgaM-4
Desired path/filename? /ram/youtube/b
--02:14:55-- http://youtube.com/get_video.php?video_id=hNa32mgaM-4&l=27&t=OEgsToPD
skIPFtZ85feiZLVqeNUmcCat&nc=16763904
=> `/ram/youtube/b.flv'
Resolving youtube.com... 208.65.153.242, 208.65.153.245, 208.65.153.240, ...
Connecting to youtube.com|208.65.153.242|:80... connected.
HTTP request sent, awaiting response...
HTTP/1.1 303 See Other
Date: Fri, 18 Aug 2006 20:22:36 GMT
Server: Apache
Set-Cookie: VISITOR_INFO1_LIVE=Cz8iYphwJaw; path=/; domain=.youtube.com; expires=Mon, 15-Aug-2016 20:22:36 GMT
Cache-Control: no-cache
Location: http://v47.youtube.com/get_video?video_id=hNa32mgaM-4
Connection: close
Content-Type: text/html; charset=utf-8
Location: http://v47.youtube.com/get_video?video_id=hNa32mgaM-4 [following]
--02:14:56-- http://v47.youtube.com/get_video?video_id=hNa32mgaM-4
=> `/ram/youtube/b.flv'
Resolving v47.youtube.com... 64.34.180.87
Connecting to v47.youtube.com|64.34.180.87|:80... connected.
HTTP request sent, awaiting response...
HTTP/1.0 200 OK
Connection: close
Content-Length: 1139071
Last-Modified: Sun, 18 Dec 2005 03:59:00 GMT
ETag: 11617f-43a4de84
Cache-Control: no-cache
Content-Type: video/flv
Date: Fri, 18 Aug 2006 20:23:31 GMT
Server: lighttpd/1.4.8
Length: 1,139,071 (1.1M) [video/flv]
100%[====================================>] 1,139,071 11.63K/s ETA 00:00
02:16:35 (11.36 KB/s) - `/ram/youtube/b.flv' saved [1139071/1139071]
ffmpeg version 0.4.9-pre1, build 4718, Copyright (c) 2000-2004 Fabrice Bellard
built on Dec 16 2005 05:33:18, gcc: 4.0.1 (4.0.1-5mdk for Mandriva Linux release 2006.0)
Input #0, flv, from '/ram/youtube/b.flv':
Duration: N/A, bitrate: N/A
Stream #0.0: Audio: mp3, 22050 Hz, mono
Stream #0.1: Video: flv, 320x240, 6.00 fps
Output #0, mpeg, to '/ram/youtube/b.mpg':
Stream #0.0: Video: mpeg1video, 320x240, 5.00 fps, q=2-31, 500 kb/s
Stream #0.1: Audio: mp2, 22050 Hz, mono, 56 kb/s
Stream mapping:
Stream #0.1 -> #0.0
Stream #0.0 -> #0.1
src="http://pagead2.googlesyndication.com/pagead/show_ads.js">
Wednesday, August 09, 2006
Installing Jira and Perforce Plugin
This is my first assignment after a very long time.
Jira is a Bug Tracking tool similar to bugzilla.
Since we are using Perforce which is similar to CVS .
We are planning to Integrate Jira with Perforce Plugin to be able to track versions.
Heres what I have done to get this running :
Jira Installation and Perforce Plugin Installation:
===================================
Jira Installation
1) Check if Java is Installed - ps -ef grep java
2) Export JAVA_Home to where you are Installing Jira
$cd /opt/Jira
$export JAVA_HOME=/usr/java/jdk1.5.0_06/
3) Download atlassian-jira-standard-3.6.3-standalone.tar.gz
4) Untar it in /opt/Jira
$tar -zxvf atlassian-jira-standard-3.6.3-standalone.tar.gz
5) By Default Jira runs on 8080 port you can change it to whatver port you want.
For eg. In our case we have changed it to 8090
Change the below two settings in
/opt/Jira/atlassian-jira-standard-3.6.3-standalone/conf/server.xml
1) Server Port "8005"
2) Connector Port "8090" <---- Port Jira Connects
6) Now Start Jira
/opt/Jira/atlassian-jira-standard-3.6.3-standalone/bin/startup.sh
To Stop Jira
/opt/Jira/atlassian-jira-standard-3.6.3-standalone/bin/shutdown.sh
7) Now Point your Browser to
http://Jira_host:8090
8) This will ask you some some questions to complete Jira Installation and a next will add a Jira Administrator.
To Obtain a Evaluation License Key (Below Link)
http://www.atlassian.com/software/jira/Licenses.jspa
Perforce Plugin Installation :
=====================
Note - Please make sure you have Installed Perforce command line tool before you Install Perforce Plugin for Jira.
You can find the P4 command Line tool from the below link
http://www.perforce.com/perforce/downloads/linux26x86.html
1) Download atlassian-jira-perforce-plugin-1.1.5.zip
2) Unzip it in /opt/Jira
3) Copy the below files from /opt/Jira/atlassian-jira-perforce-plugin-1.1.5
- atlassian-jira-perforce-plugin-1.1.5.jar
- p4package-rev13.jar
To - /opt/Jira/atlassian-jira-standard-3.6.3-standalone/atlassian-jira/WEB-INF/lib
4) Edit perforce-jira-plugin.properties from /opt/Jira/atlassian-jira-perforce-plugin-1.1.5
p4.executable=/opt/Jira/p4
Most of the Information regarding p4port , User, Pass were all Hashed in my case as I did not have the Info.
I had also hashed the Logging Entries.
5) Now copy perforce-jira-plugin.properties
To - /opt/Jira/atlassian-jira-standard-3.6.3-standalone/atlassian-jira/WEB-INF/classes
6) I have not copied any Licence for Plugins as per there Docs.
7) Restart Jira
TO see if plugin is Installed Login to Jira Web based Under Administration section > System > Plugins
It Should have Installed 7 Modules.
Jira is a Bug Tracking tool similar to bugzilla.
Since we are using Perforce which is similar to CVS .
We are planning to Integrate Jira with Perforce Plugin to be able to track versions.
Heres what I have done to get this running :
Jira Installation and Perforce Plugin Installation:
===================================
Jira Installation
1) Check if Java is Installed - ps -ef grep java
2) Export JAVA_Home to where you are Installing Jira
$cd /opt/Jira
$export JAVA_HOME=/usr/java/jdk1.5.0_06/
3) Download atlassian-jira-standard-3.6.3-standalone.tar.gz
4) Untar it in /opt/Jira
$tar -zxvf atlassian-jira-standard-3.6.3-standalone.tar.gz
5) By Default Jira runs on 8080 port you can change it to whatver port you want.
For eg. In our case we have changed it to 8090
Change the below two settings in
/opt/Jira/atlassian-jira-standard-3.6.3-standalone/conf/server.xml
1) Server Port "8005"
2) Connector Port "8090" <---- Port Jira Connects
6) Now Start Jira
/opt/Jira/atlassian-jira-standard-3.6.3-standalone/bin/startup.sh
To Stop Jira
/opt/Jira/atlassian-jira-standard-3.6.3-standalone/bin/shutdown.sh
7) Now Point your Browser to
8) This will ask you some some questions to complete Jira Installation and a next will add a Jira Administrator.
To Obtain a Evaluation License Key (Below Link)
http://www.atlassian.com/software/jira/Licenses.jspa
Perforce Plugin Installation :
=====================
Note - Please make sure you have Installed Perforce command line tool before you Install Perforce Plugin for Jira.
You can find the P4 command Line tool from the below link
http://www.perforce.com/perforce/downloads/linux26x86.html
1) Download atlassian-jira-perforce-plugin-1.1.5.zip
2) Unzip it in /opt/Jira
3) Copy the below files from /opt/Jira/atlassian-jira-perforce-plugin-1.1.5
- atlassian-jira-perforce-plugin-1.1.5.jar
- p4package-rev13.jar
To - /opt/Jira/atlassian-jira-standard-3.6.3-standalone/atlassian-jira/WEB-INF/lib
4) Edit perforce-jira-plugin.properties from /opt/Jira/atlassian-jira-perforce-plugin-1.1.5
p4.executable=/opt/Jira/p4
Most of the Information regarding p4port , User, Pass were all Hashed in my case as I did not have the Info.
I had also hashed the Logging Entries.
5) Now copy perforce-jira-plugin.properties
To - /opt/Jira/atlassian-jira-standard-3.6.3-standalone/atlassian-jira/WEB-INF/classes
6) I have not copied any Licence for Plugins as per there Docs.
7) Restart Jira
TO see if plugin is Installed Login to Jira Web based Under Administration section > System > Plugins
It Should have Installed 7 Modules.
rm command - Argument List too long
Some days back I had problems deleting n no of files in folder.
while using rm command it would say
$rm -f /home/sriram/tmp/*.txt
-bash: /bin/rm: Argument list too long
This is not a limitation of the rm command, but a kernel limitation on the size of the parameters of the command. Since I was performing shell globbing (selecting all the files with extension .txt), this meant that the size of the command line arguments became bigger with the number of the files.
One solution is to to either run rm command inside a loop and delete each individual result, or to use find with the xargs parameter to pass the delete command. I prefer the find solution so I had changed the rm line inside the script to:
find /home/$u/tmp/ -name '*.txt' -print0 xargs -0 rm
this does the trick and solves the problem. One final touch was to not receive warnings if there were no actual files to delete, like:
rm: too few arguments
Try `rm --help' for more information.
For this I have added the -f parameter to rm (-f, –force = ignore nonexistent files, never prompt). Since this was running in a shell script from cron the prompt was not needed also so no problem here. The final line I used to replace the rm one was:
find /home/$u/tmp/ -name '*.txt' -print0 xargs -0 rm -f
You can also do this in the directory:
ls xargs rm
Alternatively you could have used a one line find:
find /home/$u/tmp/ -name ‘*.txt’ -exec rm {} \; -print
Thanks to him
Monday, June 12, 2006
10 Most Valuable tips Vi Editor
1. undo & redo
don't be surprise that vi also have undo & redo capabilities. but for vi is only one level undo. not really sure how many level for vim, for sure more than vi. just press u to find out.
Esc + u or :u to undo
Ctrl + r to redo
2. search pattern
a few ways to search a pattern in vi:
/pattern search down for pattern
?pattern search up for pattern
pressing n or N to go to the next or previous matching pattern
press * or # search for a pattern under the cursor
pressing * or # to go to the next or previous matching pattern
3. search & replace
search & replace is quite important in my job where sometime i need to do a bulk replacement
:s/pattern/new_patten/ replace a pattern with new pattern
:1,$ s/pattern/new_patten/g g for replace all occurrences of pattern
:1,$ s/pattern/new_patten/c c for confirm replace
1 start from line 1
$ end at last line
Read more...
4. go to specific line
do you hate when you run a scripts, an error occurred in specific line!
this is how you go directly to the line to find out what went wrong
:n will go to line n (eg: :69 will bring your cursor to line 69)
:se nu or :set number will display line number
:.= shows current line number
:= shows number of line in file
Ctrl + g shows file name, current line number, total lines in file & % of the file location
5. vi few files
i'm sure sometime you need to edit several files at once. especially those log files.
while you are in vi, you can open up other file using:
:split other_file to open other file & will split into 2 screens
Ctrl + w + w to switch between the files
while in command prompt, simply:
$ vi file1 file2 file3
:n edit next file (file2)
:n edit next file (file3)
:rew rewind to the first file (file1)
6. shell access or run a command
while editing a file in vi, you can also access shell to run specific commands without quiting from vi
:shell will gives you a command prompt, type exit when you done with the shell, will return back to vi
or simply use :!command to execute the command
7. command output into vi
don't waste time to copy & paste the command output, instead redirect it into the file
:r!cat /etc/passwd will inserts content of /etc/passwd into the current file
8. recovering your file
life is not perfect, sometime something goes wrong while you are editing your file, eg: power failure or lost connection. indeed you can recover it back by using:
$ vi -r your_filename
9. word completion
for me this feature is quite useful for developers since they most likely repeating the same words/patterns:
type a few characters of the word and then keep on pressing Ctrl + p or Ctrl + n until you find the match, but make sure the words/patterns are already there in the file.
10. get help, don't panic!
if you get lost or no idea how to do things in vi, don't panic! get help
use :h or :help to access the main help file
to go directly to specific help, give an argument to the :help command
or to search for help use :help any_word eg: :help me will bring you to the line which contains word me, pressing Ctrl + d to see matching help entries for me.
Thanks to this article
Saturday, June 10, 2006
Who Visits your Website - Apache logs
There are couple of Programs like Awstats, PhpMyVisites etc ...
which can calculate the statistics of Visitors from your Apache Logs.
But what if you are lazy like me to configure those stuff,
Create logins etc... and check the graph.
Heres a easy way out :
[root@localhost unixbox]# cat /var/log/httpd/access_log
| sort | uniq -w15 -c | cut -f 1 -d- | sort -r -g
10 210.214.45.231
6 210.214.243.38
4 210.214.190.85
2 210.214.190.250
2 202.171.143.53
2 201.2.65.26
2 200.124.175.159
2 200.124.167.220
The Left hand side will list the total number of hits from the IP addresses.
For example 210.214.45.231 has visited us 10 times,
Now if you want to check the date and time of the visit grep
that particular IP address in access_log.
Now suppose you want the total number of hits for a Particular Directory,
then you may try this, Say For eg. /ram/ directory and print a count
(from greatest to least).
add this " grep -e /ram " , like the below command will list IP addresses
accessing /ram folder.
[root@localhost unixbox]# cat /var/log/httpd/access_log
|grep -e /ram/ | sort | uniq -w15 -c | cut -f 1 -d- | sort -r -g
Thanks to this article
Friday, June 09, 2006
Ngrep - Network Traffic Monitoring
Constant monitoring and troubleshooting are key to maintaining a network's availability.
With ngrep, you can analyze network traffic in a manner similar
to that of other network sniffers. However, unlike its brethern,
ngrep can match regular expressions within the network packet payloads.
By using its advanced string matching capabilities, ngrep can look
for packets on specified ports and assist in tracking the usernames
and passwords zipping off the network, as well as all Telnet
attempts to the server.
Ngrep uses the libpcap library, and can also take hexadecimal
expressions for which to capture network traffic. It supports
TCP, UDP, ICMP, IGMP, and Raw protocols across Ethernet,
PPP, SLIP, FDDI, Token Ring, 802.11, and null interfaces.
In addition to listening to live traffic, ngrep can also filter
previous tcpdump grabs.
Author Jordan Ritter says that ngrep has traditionally been
used to debug plaintext protocol interactions such as
HTTP, SMTP, and FTP; to identify and analyze anomalous network communications, such as those between worms, viruses, and
zombies; and to store, read, and reprocess pcap dump files
while looking for specific data patterns.
You can also use ngrep to do the more mundane plaintext
credential collection, as with HTTP basic authentication or
FTP or POP3 authentication. Like all tools, it can be useful
in the right hands and damaging if used by those with less
than admirable intentions.
Before installing the 400-odd KB utility, make sure you have
the libpcap library. If you use tcpdump, you have it.
Although I have installed it through urpmi.
[root@localhost ~]# ngrep -d any port 25
interface: any
filter: (ip) and ( port 25 )
####
T 127.0.0.1:25 -> 127.0.0.1:1938 [AP]
220 localhost ESMTP Postfix (2.2.5) (Mandriva Linux)..
#
#
T 127.0.0.1:1938 -> 127.0.0.1:25 [AP]
quit..
##
T 127.0.0.1:25 -> 127.0.0.1:1938 [AP]
221 Bye..
######exit
This will Monitor all activity crossing source or destination
port 25 (SMTP).
[root@localhost ~]# ngrep -wi -d any 'user|pass' port 21
interface: any
filter: (ip) and ( port 21 )
match: ((^user|pass\W)|(\Wuser|pass$)|(\Wuser|pass\W))
########
T 202.41.9.99:21 -> 10.10.93.220:4472 [AP]
530 Please login with USER and PASS...
##
T 202.41.9.99:21 -> 10.10.93.220:4472 [AP]
530 Please login with USER and PASS...
##
T 10.10.93.220:4472 -> 202.41.9.99:21 [AP]
USER aaa..
###
T 10.10.93.220:4472 -> 202.41.9.99:21 [AP]
PASS aaa123..
######
T 202.41.9.99:21 -> 10.10.93.220:4472 [AP]
530 Please login with USER and PASS...
#######
exit
56 received, 0 dropped
Monitor any traffic crossing source or destination port 21 (FTP),
looking case-insensitively for the words ``user'' or ``pass'',
matched as word-expressions (the match term(s) must have
non-alphanumeric, delimiting characters surrounding them).
[root@localhost ~]# ngrep port 80
interface: eth0 (10.10.93.0/255.255.255.0)
filter: (ip) and ( port 80 )
####
##
T 10.10.93.220:2452 -> 66.102.15.100:80 [AP]
The above will debug http connections
[root@localhost ~]# ngrep -d any 'error' port syslog
interface: any
filter: (ip) and ( port syslog )
match: error
Monitor any network-based syslog traffic for the occurrence
of the word ``error''. ngrep knows how to convert service port
names (on UNIX, located in ``/etc/services'') to port numbers.
Wednesday, June 07, 2006
Bash Hotkeys
ctrl-l -- clear screen
ctrl-r -- does a search in the previously given commands so that you don't have to repeat long command.
ctrl-u -- clears the typing before the hotkey.
ctrl-a -- takes you to the beginning of the command you are currently typing.
ctrl-e -- takes you to the end of the command you are currently typing in.
esc-b -- takes you back by one word while typing a command.
ctrl-c -- kills the current command or process.
ctrl-d -- kills the shell.
ctrl-h -- deletes one letter at a time from the command you are typing in.
ctrl-z -- puts the currently running process in background, the process can be brought back to run state by using fg command.
esc-p -- like ctrl-r lets you search through the previously given commands.
esc-. -- gives the last command you typed.
Tuesday, May 30, 2006
Bash Script - Case Statement
Heres a case statement I wrote to check current users logged in,
what they are doing etc ...
[root@localhost Bash]# cat case.sh
#!/bin/bash
echo "1 - Shows a listing of currently logged-in users "
echo "2 - Shows who is logged on and what they are doing "
echo "3 - Shows a list of last logged-in users, including login time,
logout time, login IP address, etc"
echo " 4 - Same as last, except that by default it shows a log of the
file /var/log/btmp, which contains all the bad login attempts."
echo " 5 - This reports data maintained in /var/log/lastlog,
which is a record of the last time a user logged in."
echo "6 - Exit Menu"
echo "Enter your Options "
read e;
case $e in
1) who ;;
2) w ;;
3) last ;;
4) lastb ;;
5) lastlog ;;
6) exit;;
*) echo "$e Opps Option not available, Please choose between 1 to 5"
esac
Save the file and exit
Saturday, May 27, 2006
Nessus - Network Vulnerability Scanner
Nessus is made up of two parts : a client and a server.
You need a Unix-like system to use the server (Linux is just fine).
Steps
1) First Install Nessus Server
2) Second Install Nessus Plugins
3) Third Install Nessus Client
4) After you have done the above Register with Nessus to activate Plugins
http://www.nessus.org/plugins/register
http://www.nessus.org/plugins/index.php?view=register
5) Activate Plugin,
#nessus-fetch --register 5DC4-24CD-0B17-6ED8-1BFA
5DC4-24CD-0B17-6ED8-1BFA --- is the code i received in my Mailbox
6) Update the Plugin
[root@localhost ~]# nessus-update-plugins -v
7) Add a Nessus user to login to server and scan for Vulnerabilities.
In Mandriva 2006
You need to fetch 3 things For using Nessus:
For Nessus Server
[root@localhost ~]#urpmi nessus
For Nessus Plugins
[root@localhost ~]# urpmi nessus-plugins
ftp://distrib-coffee.ipsl.jussieu.fr/pub/linux/MandrivaLinux/official/2006.0
/i586/media/contrib/nessus-plugins-2.2.4-1mdk.i586.rpm
installing nessus-plugins-2.2.4-1mdk.i586.rpm from /var/cache/urpmi/rpms
Preparing... ###############################
1/1: nessus-plugins #############################################
For Nessus Client
[root@localhost ~]# urpmi nessus-client
ftp://distrib-coffee.ipsl.jussieu.fr/pub/linux/MandrivaLinux/official/2006.0
/i586/media/contrib/nessus-client-2.2.4-1mdk.i586.rpm
installing nessus-client-2.2.4-1mdk.i586.rpm from /var/cache/urpmi/rpms
Preparing... ###################################
1/1: nessus-client ##################################
Update Nessus Plugin :
#nessus-fetch --register 5DC4-24CD-0B17-6ED8-1BFA
Now Create a Nessus User to be able to login from Nessus Client :
[root@localhost ~]# nessus-adduser
Add a new nessusd user
----------------------
Login : sriram
Authentication (pass/cert) [pass] : pass
Login password :
Login password (again) :
Password : ***********
DN :
Rules :
Start Nessus Server
[root@localhost ~]# nessusd -D
Loading the plugins... 2856 (out of 3584)
------------------------------------------------------------------------------
You are running a version of Nessus which is not configured to receive
a full plugin feed. As a result, your security audits might produce incomplete
results.
To obtain a full plugin feed, you need to register your Nessus scanner
at the following URL :
http://www.nessus.org/register/
------------------------------------------------------------------------------
All plugins loaded
Update the Plugins :
[root@localhost ~]# nessus-update-plugins -v
Now login to the client with the user name created to find ,
if there are any Vulnerabilities :
[root@localhost ~]#nessus (This will open the Nessus Client)
You need a Unix-like system to use the server (Linux is just fine).
Steps
1) First Install Nessus Server
2) Second Install Nessus Plugins
3) Third Install Nessus Client
4) After you have done the above Register with Nessus to activate Plugins
http://www.nessus.org/plugins/register
http://www.nessus.org/plugins/index.php?view=register
5) Activate Plugin,
#nessus-fetch --register 5DC4-24CD-0B17-6ED8-1BFA
5DC4-24CD-0B17-6ED8-1BFA --- is the code i received in my Mailbox
6) Update the Plugin
[root@localhost ~]# nessus-update-plugins -v
7) Add a Nessus user to login to server and scan for Vulnerabilities.
In Mandriva 2006
You need to fetch 3 things For using Nessus:
For Nessus Server
[root@localhost ~]#urpmi nessus
For Nessus Plugins
[root@localhost ~]# urpmi nessus-plugins
ftp://distrib-coffee.ipsl.jussieu.fr/pub/linux/MandrivaLinux/official/2006.0
/i586/media/contrib/nessus-plugins-2.2.4-1mdk.i586.rpm
installing nessus-plugins-2.2.4-1mdk.i586.rpm from /var/cache/urpmi/rpms
Preparing... ###############################
1/1: nessus-plugins #############################################
For Nessus Client
[root@localhost ~]# urpmi nessus-client
ftp://distrib-coffee.ipsl.jussieu.fr/pub/linux/MandrivaLinux/official/2006.0
/i586/media/contrib/nessus-client-2.2.4-1mdk.i586.rpm
installing nessus-client-2.2.4-1mdk.i586.rpm from /var/cache/urpmi/rpms
Preparing... ###################################
1/1: nessus-client ##################################
Update Nessus Plugin :
#nessus-fetch --register 5DC4-24CD-0B17-6ED8-1BFA
Now Create a Nessus User to be able to login from Nessus Client :
[root@localhost ~]# nessus-adduser
Add a new nessusd user
----------------------
Login : sriram
Authentication (pass/cert) [pass] : pass
Login password :
Login password (again) :
User rulesLogin : sriram
----------
nessusd has a rules system which allows you to
restrict the hosts that sriram has the right
to test. For instance, you may want
him to be able to scan his own host only.
Please see the nessus-adduser(8) man page for
the rules syntax
Enter the rules for this user, and hit ctrl-D once
you are done :
(the user can have an empty rules set)
deny 10.163.156.1
accept 10.163.156.0/24
default deny
Password : ***********
DN :
Rules :
deny 10.163.156.1
accept 10.163.156.0/24
default deny

Is that ok ? (y/n) [y] Y
user added.
Start Nessus Server
[root@localhost ~]# nessusd -D
Loading the plugins... 2856 (out of 3584)
------------------------------------------------------------------------------
You are running a version of Nessus which is not configured to receive
a full plugin feed. As a result, your security audits might produce incomplete
results.
To obtain a full plugin feed, you need to register your Nessus scanner
at the following URL :
http://www.nessus.org/register/
------------------------------------------------------------------------------
All plugins loaded
Update the Plugins :
[root@localhost ~]# nessus-update-plugins -v
Now login to the client with the user name created to find ,
if there are any Vulnerabilities :
[root@localhost ~]#nessus (This will open the Nessus Client)
Thursday, May 25, 2006
Linux Feed Reader
Liferea is an aggregator for online news feeds.
There are many other news readers available, but these
others are not available for Linux or require many extra
libraries to be installed. Liferea tries to fill this gap
by creating a fast, easy to use, easy to install news
aggregator for GTK/GNOME.
In Mandriva 2006 , you can use urpmi(Package Manger)
to download and install this Feed Reader.
[root@localhost ~]# urpmi liferea
ftp://distrib-coffee.ipsl.jussieu.fr/pub/linux/MandrivaLinux/official/2006.0/
i586/media/contrib/liferea-0.9.7b-4mdk.i586.rpm
installing liferea-0.9.7b-4mdk.i586.rpm from /var/cache/urpmi/rpms
Preparing... #############################################
1/1: liferea #############################################
This should install liferea.
To start liferea, type liferea& in the Console.
Heres the screenshot of Liferea
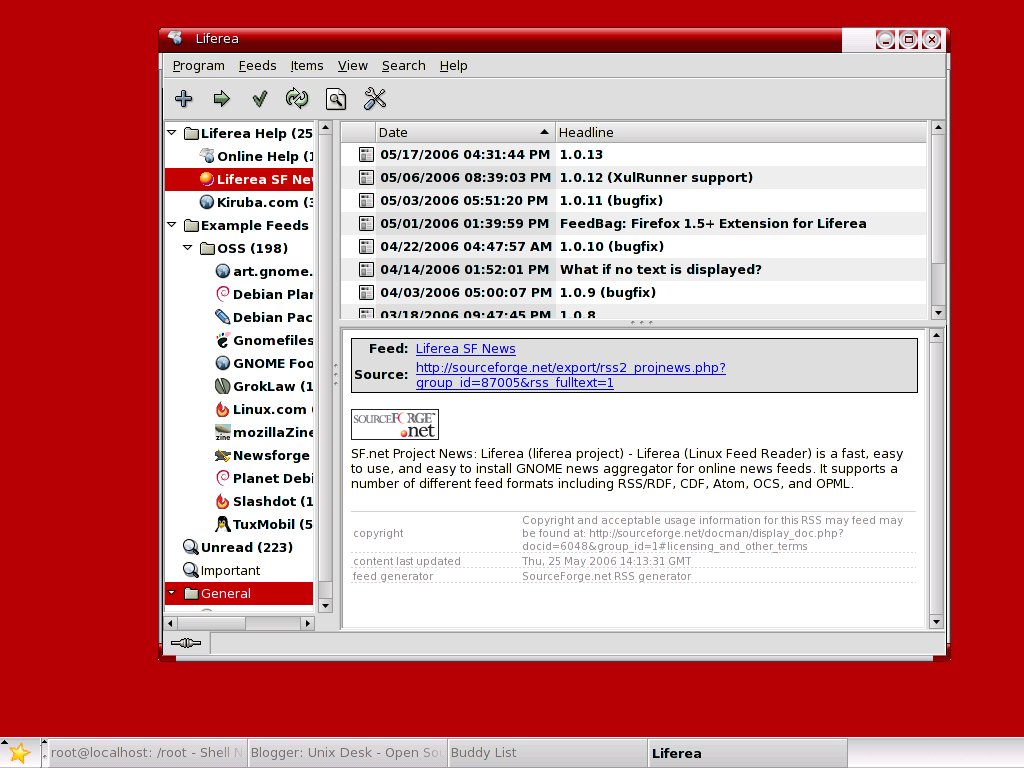
Monday, May 15, 2006
Forensic Tools
List of Forensic and Network Security Tools installed - Most of these
tools are not graphical.
tools are not graphical.
-
Sleuth Kit - Command Line Forensic Tools - www.sleuthkit.org
- utopsy - Part of Sleuth Kit
- foremost - Command line data carving tool. Config file in /foremost directory. Need external storage to run properly - foremost.sourceforge.net
- glimpse - Command line data indexing and searching tool. Need external storage to run properly - www.webglimpse.net
- wipe - Command line utility to securely wipe hard drives and files - wipe.sourceforge.net
- dcfldd - Enhanced DD imager with built in hashing. Works like dd from command line. For more info read the man page (man dcfldd).
- etherape - Visual network monitor - etherape.sourceforge.net/
- fenris - Multipurpose tracer - razor.bindview.com/tools/fenris/
- honeyd - Command line honypot program - www.citi.umich.edu/u/provos/honeyd/
- snort (Default Rules) - Command line network intrusion tool - www.snort.org
- dsniff - Command Line network auditing and penetration testing tools - www.monkey.org/~dugsong/dsniff/
- John The Ripper - Command Line Password Cracking tool - www.openwall.com/john/
- Nikto - Webserver scanner - www.cirt.net/code/nikto.shtml
- nbtscan - Command-line tool that scans for open NETBIOS nameservers - www.unixwiz.net/tools/nbtscan.html
- xprobe - Command line remote operating system fingerprinting tool - www.sys-security.com
- Ngrep - Command line Network grep Function - www.packetfactory.net/projects/ngrep/
- Nemesis - Command Line network packet injector - www.packetfactory.net/Projects/nemesis/
- fragroute - Command line network intrusion testing tool - monkey.org/~dugsong/fragroute/
- fping - Command line multiple host ping utility - www.fping.com
- TCPtraceroute - Command line traceroute TCP packages - michael.toren.net/code/tcptraceroute/
- tcpreplay - Command line utility that replays a tcp dump - tcpreplay.sourceforge.net
- Nessus - Graphical Security Scanner - www.nessus.org
- Ethereal - Graphical Network analyzer - www.ethereal.com
- Netcat - Command line tool to read and write over network - www.atstake.com/research/tools/network_utilities/
- tcpdump - Command line tool that dumps network traffic - www.tcpdump.org/
- hping2 - Command line packet assembler / analyzer - www.hping.org
- ettercap - Command line sniffer / interceptor / logger for Ethernet networks - ettercap.sourceforge.net
- openssh - Secure remote connection utility - www.openssh.com
- Kismet - Graphical wireless network sniffer - www.kismetwireless.net
- airsnort - Graphical wireless network intrusion tool - airsnort.shmoo.com
- GPG - Encryption utility - www.gnupg.org/
- OpenSSL - Secure remote connection utility - www.openssl.org/
- lsof - Command line utility that lists all open files - read man page (man lsof)
- hunt - Command line TCP / IP exploit scanner - lin.fsid.cvut.cz/~kra/index.html
- stunnel - SSL connection package - stunnel.mirt.net
- arpwatch - Command line Ethernet monitor - read man page (man arpwatch)
- dig - Command line tool for querying domain name servers - read man page (man dig)
- chkrootkit - Looks for signs of root kit - www.chkrootkit.org
- Nmap - Network exploration tool and Security Scanner.
- Dsniff - Password Sniffer.
- Tripwire - Tripwire creates a signature database of the files on a system, and when run in compare mode, will alert system administrators to changes in the file system.
Sunday, May 14, 2006
Daily Checklist ... ... ...
Check List for Server Safeguards :
Check if any rpms have been installed Lately :
[root@localhost ~]# rpm -qa --last |more
xinetd-2.3.13-2mdk Sat 13 May 2006 08:14:31 PM EDT
anonftp-3.0-31mdk Sat 13 May 2006 08:10:01 PM EDT
wu-ftpd-2.6.2-6mdk Sat 13 May 2006 08:07:00 PM EDT
Checking People Connected to a Specific PORT :
For Example (port - 21,22,25 etc ...)
I checked for Port 25
[root@localhost ram]# lsof -i :25
COMMAND PID USER FD TYPE
master 5761 root 11u IPv4
telnet 21932 root 3u IPv4
smtpd 21933 postfix 6u IPv4
smtpd 21933 postfix 10u IPv4
DEVICE SIZE NODE NAME
12532 TCP localhost:smtp (LISTEN)
106579 TCP localhost:4835->localhost:smtp (ESTABLISHED)
12532 TCP localhost:smtp (LISTEN)
106600 TCP localhost:smtp->localhost:4835 (ESTABLISHED)
Another way is to use TCPDUMP to see any active connections are made to
a Particular port :
[root@localhost ~]# tcpdump -l -i eth0 port 22
tcpdump: verbose output suppressed, use -v or -vv for full protocol decode
listening on lo, link-type EN10MB (Ethernet), capture size 96 bytes
This will list the IP addresses from where the connections are made.
11:28:17.137522 IP localhost.ssh > localhost.1460: F 1463822750:1463822750(0)
ack 1461555328 win 8192
11:28:17.138112 IP localhost.1460 > localhost.ssh: F 1:1(0) ack 1 win 8192
11:28:17.138133 IP localhost.ssh > localhost.1460: . ack 2 win 8192
The above shows that I have made a connection from localhost to localhost on port 22
Imagine Systems stops working suddenly, One thing that comes immediately
to our mind is what changed :
#find /ram -mmin -30
The above commmad will find Files that have been changed in /ram in the
last 30 Minutes
#find / -mtime -1
The above command will recursively list all the file from / that have changed in the last
day.
Checking Logs
Check for Log Files created in /var/log , Files will be created as per applications
used by you.
Common Log files are
/var/log/boot.log --- Systems services that has been Started/Stopped
May 14 12:46:28 localhost xinetd: xinetd shutdown succeeded
May 14 12:46:35 localhost xinetd: xinetd startup succeeded
/var/log/messages --- Check Logins
May 14 12:50:27 localhost sshd[22453]: Accepted password for sriram
from 127.0.0.1 port 3242 ssh2
/var/log/secure --- Check Xinetd Services
May 14 09:30:07 localhost xinetd[5396]: START: ftp pid=21491 from=127.0.0.1
May 14 09:31:27 localhost xinetd[5396]: EXIT: ftp pid=21491 duration=80(sec)
May 14 11:15:32 localhost xinetd[5396]: START: ftp pid=21925 from=127.0.0.1
May 14 11:17:13 localhost xinetd[5396]: EXIT: ftp pid=21925 duration=101(sec)
/var/log/auth.log --- Check Authetication Failures
May 14 11:15:32 localhost xinetd[5396]: START: ftp pid=21925 from=127.0.0.1
May 14 11:17:13 localhost xinetd[5396]: EXIT: ftp pid=21925 duration=101(sec)
May 14 11:28:17 localhost sshd[22092]: fatal: Timeout before authentication for 127.0.0.1
May 14 12:50:27 localhost sshd[22453]: Accepted password for sriram from
127.0.0.1 port 3242 ssh2
May 14 12:52:18 localhost sshd[22503]: Accepted password for sriram from 127.0.0.1
port 3245 ssh2
#dmesg
The program helps users to print out their bootup messages.
Checking Disk Space of a Particular Folder,Files
[root@localhost ram]# du -h -s Beatles/
27M Beatles/
Install Dsniff for Packet Sniffing
[root@localhost ram]# dsniff
dsniff: listening on eth0
-----------------
05/14/06 16:58:47 tcp 10.10.93.220.1785 -> distrib-coffee.ipsl.jus.21 (ftp)
USER anonymous
PASS curl_by_sriram@haha.com
-----------------
05/14/06 17:35:24 tcp 10.10.93.220.1875 -> 202.41.x.x.21 (ftp)
USER xyz
PASS xyz123
Check for Current connections made FROM and TO Server
[root@localhost ram]# netstat -apln --inet
Active Internet connections (servers and established)
Will List the Complete details of From-IP-Port to To-IP-Port live connections.
Rejecting a Particular connections with out using IPTables
Say you do not want to reject request for a particular IP Address
Incomming and Outgoing
For Rejection:
[root@localhost ram]# route add -host 202.x.x.x reject
Again to allow:
[root@localhost ram]# route del -host 202.87.41.71 reject
If for eg. if you want to block a particular site do this
[root@localhost ram]# ping xyz.com
PING xyz.com (64.146.134.38) 56(84) bytes of data.
Now to block xyz.com
[root@localhost ram]# route add -host 64.146.134.38 reject
You can also block the Domain Name,
[root@localhost ram]# route add -host xyz.com reject
after blocking try xyz.com in your browser,
The message I got in my browser was,
"Connection was refused when attempting to contact xyz.com"
To unblock Later
[root@localhost ram]# route del -host xyz.com reject
Preventing DDOS Attack- Say your Load on the server is very high
For a Particular Service say HTTP- Port 80
Then you may do the Following :
1) At command prompt execute the below command
Like let me say , that you have more than 30 connection from a single ip.
Under normal cases there is no need for that many number of connection
requests from a single IP. Try to identify such ips/networks from the list you get.
To Unblock
[root@localhost ~]# iptables -D INPUT -s 202.87.x.x -j REJECT
Suppose 202.87.x.x is website than that site will also be blocked.
Some Commands :
# lspci list all your pci devices
# netstat -arn show your network route information
# netstat -ap 2 | grep EST show established connections, updates every 2 sec
# netstat -Cr print routing information from routing cache
# iptables -nL show your current iptables configuration in numeric form
# ping -c ping X times.
# ping6 ping ipv6 addresses
# dmesg print or control the kernel ring buffer, bootup messages
# uptime check your linux servers uptime and load
Try this when your System Hangs - To Trace the Problems ?
Try the following:
1. Capture an alt-sysrq-t or alt-sysrq-p or alt-sysrq-b or alt-sysrq-m backtrace when the hang occurs.
2. Capture whatever is on the screen.
3. Look for kerlnel oops in the /var/log/messages or /var/log/syslog after reboot.
Note : sysrq is the Delete Key
Securing and Hardenning Linux Check this
Check if any rpms have been installed Lately :
[root@localhost ~]# rpm -qa --last |more
xinetd-2.3.13-2mdk Sat 13 May 2006 08:14:31 PM EDT
anonftp-3.0-31mdk Sat 13 May 2006 08:10:01 PM EDT
wu-ftpd-2.6.2-6mdk Sat 13 May 2006 08:07:00 PM EDT
Checking People Connected to a Specific PORT :
For Example (port - 21,22,25 etc ...)
I checked for Port 25
[root@localhost ram]# lsof -i :25
COMMAND PID USER FD TYPE
master 5761 root 11u IPv4
telnet 21932 root 3u IPv4
smtpd 21933 postfix 6u IPv4
smtpd 21933 postfix 10u IPv4
DEVICE SIZE NODE NAME
12532 TCP localhost:smtp (LISTEN)
106579 TCP localhost:4835->localhost:smtp (ESTABLISHED)
12532 TCP localhost:smtp (LISTEN)
106600 TCP localhost:smtp->localhost:4835 (ESTABLISHED)
Another way is to use TCPDUMP to see any active connections are made to
a Particular port :
[root@localhost ~]# tcpdump -l -i eth0 port 22
tcpdump: verbose output suppressed, use -v or -vv for full protocol decode
listening on lo, link-type EN10MB (Ethernet), capture size 96 bytes
This will list the IP addresses from where the connections are made.
11:28:17.137522 IP localhost.ssh > localhost.1460: F 1463822750:1463822750(0)
ack 1461555328 win 8192
11:28:17.138112 IP localhost.1460 > localhost.ssh: F 1:1(0) ack 1 win 8192
11:28:17.138133 IP localhost.ssh > localhost.1460: . ack 2 win 8192
The above shows that I have made a connection from localhost to localhost on port 22
Imagine Systems stops working suddenly, One thing that comes immediately
to our mind is what changed :
#find /ram -mmin -30
The above commmad will find Files that have been changed in /ram in the
last 30 Minutes
#find / -mtime -1
The above command will recursively list all the file from / that have changed in the last
day.
Checking Logs
Check for Log Files created in /var/log , Files will be created as per applications
used by you.
Common Log files are
/var/log/boot.log --- Systems services that has been Started/Stopped
May 14 12:46:28 localhost xinetd: xinetd shutdown succeeded
May 14 12:46:35 localhost xinetd: xinetd startup succeeded
/var/log/messages --- Check Logins
May 14 12:50:27 localhost sshd[22453]: Accepted password for sriram
from 127.0.0.1 port 3242 ssh2
/var/log/secure --- Check Xinetd Services
May 14 09:30:07 localhost xinetd[5396]: START: ftp pid=21491 from=127.0.0.1
May 14 09:31:27 localhost xinetd[5396]: EXIT: ftp pid=21491 duration=80(sec)
May 14 11:15:32 localhost xinetd[5396]: START: ftp pid=21925 from=127.0.0.1
May 14 11:17:13 localhost xinetd[5396]: EXIT: ftp pid=21925 duration=101(sec)
/var/log/auth.log --- Check Authetication Failures
May 14 11:15:32 localhost xinetd[5396]: START: ftp pid=21925 from=127.0.0.1
May 14 11:17:13 localhost xinetd[5396]: EXIT: ftp pid=21925 duration=101(sec)
May 14 11:28:17 localhost sshd[22092]: fatal: Timeout before authentication for 127.0.0.1
May 14 12:50:27 localhost sshd[22453]: Accepted password for sriram from
127.0.0.1 port 3242 ssh2
May 14 12:52:18 localhost sshd[22503]: Accepted password for sriram from 127.0.0.1
port 3245 ssh2
#dmesg
The program helps users to print out their bootup messages.
Checking Disk Space of a Particular Folder,Files
[root@localhost ram]# du -h -s Beatles/
27M Beatles/
Install Dsniff for Packet Sniffing
[root@localhost ram]# dsniff
dsniff: listening on eth0
-----------------
05/14/06 16:58:47 tcp 10.10.93.220.1785 -> distrib-coffee.ipsl.jus.21 (ftp)
USER anonymous
PASS curl_by_sriram@haha.com
-----------------
05/14/06 17:35:24 tcp 10.10.93.220.1875 -> 202.41.x.x.21 (ftp)
USER xyz
PASS xyz123
Check for Current connections made FROM and TO Server
[root@localhost ram]# netstat -apln --inet
Active Internet connections (servers and established)
Will List the Complete details of From-IP-Port to To-IP-Port live connections.
Rejecting a Particular connections with out using IPTables
Say you do not want to reject request for a particular IP Address
Incomming and Outgoing
For Rejection:
[root@localhost ram]# route add -host 202.x.x.x reject
Again to allow:
[root@localhost ram]# route del -host 202.87.41.71 reject
If for eg. if you want to block a particular site do this
[root@localhost ram]# ping xyz.com
PING xyz.com (64.146.134.38) 56(84) bytes of data.
Now to block xyz.com
[root@localhost ram]# route add -host 64.146.134.38 reject
You can also block the Domain Name,
[root@localhost ram]# route add -host xyz.com reject
after blocking try xyz.com in your browser,
The message I got in my browser was,
"Connection was refused when attempting to contact xyz.com"
To unblock Later
[root@localhost ram]# route del -host xyz.com reject
Preventing DDOS Attack- Say your Load on the server is very high
For a Particular Service say HTTP- Port 80
Then you may do the Following :
1) At command prompt execute the below command
bash#netstat -lpn|grep :80 |awk '{print $5}'|sort
2) Check each block of ips.
Like let me say , that you have more than 30 connection from a single ip.
Under normal cases there is no need for that many number of connection
requests from a single IP. Try to identify such ips/networks from the list you get.
3) If more than 5 host/ip connects from the same network then its a clear sign of DDOS .
4) Block that ips/networks using iptables /Apf
[root@localhost ~]# iptables -I INPUT -s 202.87.X.X -j REJECT
If you have apf then just add the ips which you want to block in the file /etc/apf/deny_hosts.rules
5) Keep on continuing this process untill the attack on the machine gets reduced.
To Unblock
[root@localhost ~]# iptables -D INPUT -s 202.87.x.x -j REJECT
Suppose 202.87.x.x is website than that site will also be blocked.
Some Commands :
# lspci list all your pci devices
# netstat -arn show your network route information
# netstat -ap 2 | grep EST show established connections, updates every 2 sec
# netstat -Cr print routing information from routing cache
# iptables -nL show your current iptables configuration in numeric form
# ping -c ping X times.
# ping6 ping ipv6 addresses
# dmesg print or control the kernel ring buffer, bootup messages
# uptime check your linux servers uptime and load
Try this when your System Hangs - To Trace the Problems ?
Try the following:
1. Capture an alt-sysrq-t or alt-sysrq-p or alt-sysrq-b or alt-sysrq-m backtrace when the hang occurs.
2. Capture whatever is on the screen.
3. Look for kerlnel oops in the /var/log/messages or /var/log/syslog after reboot.
Note : sysrq is the Delete Key
Securing and Hardenning Linux Check this
Saturday, May 13, 2006
Setting up FTP and Anonymous FTP Server
There are two kinds of FTP service. One allows regular users on your
system to login from a remote system using FTP. The other type of FTP
is anonymous FTP which allows any user on a remote system to login to
your system and download files from the /home/ftp/pub/ directory.
In order to set up either of these types of FTP on your system,
you need the package wu-ftpd. To enable anonymous FTP, you’ll also
need the anonftp package. If these are not installed, they come with all
distributions of Linux, and are also available at rpmfind.net
First download and Install
wu-ftp (For Regular FTP user with User Logins)
anon-ftp (For Anonymous Logins)
Xinetd (For Start/Stop the above Services)
then,
Create directory /home/ftp/pub for anonymous logins
Set permission for /home/ftp/pub to read
chmod -R 444 /home/ftp
Change the ownership permission to sriram
chown -R sriram.sriram /home/ftp
[root@localhost jabberd-2.0s11]# urpmi wu-ftpd
ftp://distrib-coffee.ipsl.jussieu.fr/pub/linux/MandrivaLinux/official
/2006.0/i586/media/contrib/wu-ftpd-2.6.2-6mdk.i586.rpm
installing wu-ftpd-2.6.2-6mdk.i586.rpm from /var/cache/urpmi/rpms
Preparing... #############################################
1/1: wu-ftpd #############################################
[root@localhost jabberd-2.0s11]# urpmi anonftp
ftp://distrib-coffee.ipsl.jussieu.fr/pub/linux/MandrivaLinux/official
/2006.0/i586/media/contrib/anonftp-3.0-31mdk.i586.rpm
installing anonftp-3.0-31mdk.i586.rpm from /var/cache/urpmi/rpms
Preparing... #############################################
1/1: anonftp #############################################
[root@localhost jabberd-2.0s11]#
[root@localhost jabberd-2.0s11]# urpmi xinetd
ftp://distrib-coffee.ipsl.jussieu.fr/pub/linux/MandrivaLinux/official
/2006.0/i586/media/main/xinetd-2.3.13-2mdk.i586.rpm
installing xinetd-2.3.13-2mdk.i586.rpm from /var/cache/urpmi/rpms
Preparing... #############################################
1/1: xinetd #############################################
[root@localhost xinetd.d]# pwd
/etc/xinetd.d
[root@localhost xinetd.d]# cat wu-ftpd
# default: on
# description: The wu-ftpd FTP server serves FTP connections. It uses \
# normal, unencrypted usernames and passwords for authentication.
service ftp
{
socket_type = stream
wait = no
user = root
server = /usr/sbin/in.ftpd
server_args = -l -a
log_on_success += DURATION USERID
log_on_failure += USERID
nice = 10
}
[root@localhost xinetd.d]#
[root@localhost jabberd-2.0s11]# /etc/rc.d/init.d/xinetd start
Starting xinetd: [ OK ]
[root@localhost jabberd-2.0s11]# telnet localhost 21
Trying 127.0.0.1...
Connected to localhost (127.0.0.1).
Escape character is '^]'.
220 localhost FTP server (Version wu-2.6.2(1) Thu Jun 2 19:14:54 CEST 2005) ready.
quit
221 Goodbye.
Now Setting up Anonymous ftp :
Create directory /home/ftp/pub with just read permission and change the user to sriram or any
local user you may have created never root.
[root@localhost ~]# mkdir -p /home/ftp/pub
[root@localhost ~]#cd /home
[root@localhost home]# chmod -R 444 ftp/
[root@localhost xinetd.d]# chown -R sriram.sriram /home/ftp
Restart Xinetd and see if anonymous ftp is working :
[root@localhost ~]# ftp
ftp> o
(to) localhost
Connected to localhost.
220 localhost FTP server (Version wu-2.6.2(1) Thu Jun 2 19:14:54 CEST 2005) ready.
530 Please login with USER and PASS.
Name (localhost:root): anonymous
331 Guest login ok, send your complete e-mail address as password.
Password:
230-The response 'haha' is not valid
230-Next time please use your e-mail address as your password
230- for example: joe@localhost
230 Guest login ok, access restrictions apply.
Remote system type is UNIX.
Using binary mode to transfer files.
ftp> ls
200 PORT command successful.
150 Opening ASCII mode data connection for directory listing.
total 32
d--x--x--x 2 root root 4096 May 14 00:10 bin
d--x--x--x 2 root root 4096 May 14 00:10 etc
drwxr-xr-x 2 root root 4096 May 14 00:10 lib
drwxr-xr-x 2 root 423 4096 May 10 2005 pub
226 Transfer complete.
ftp>
Subscribe to:
Comments (Atom)